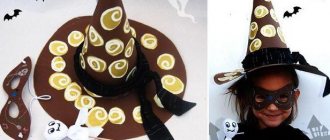
Halloween began to be celebrated in our country relatively recently, but this unusual holiday almost immediately gained incredible popularity, reviving the tradition of carnivals. As you know, no carnival is complete without costumes of witches, ghosts and other evil spirits. Let's take a step-by-step look at how a witch's hat can be made quickly and easily with your own hands from scrap materials - paper, felt and fabric.
Witch hat: how to make it yourself from paper, fabric, felt, cloth and burlap
Celebrating Halloween has already become a fun tradition in our country. One of the most popular female images for this holiday is a witch costume with a pointed hat. You can buy it in a store or try to make a witch hat yourself. It's not difficult at all and will take a little time.
What you need to make your own Halloween witch hat
Making such an accessory is very simple. This does not require many tools and materials.
You need to prepare:
- scissors;
- transparent tape;
- glue;
- black paint;
- wire;
- decorative elements for decorating a hat;
- fabric or paper.
These are the main things that will be required during the manufacturing process. Of course, some models may require additional accessories. But this basic set is quite enough to create an original accessory for a witch costume with your own hands.
How to Make a Witch Hat for Halloween
How and from what to make a headdress depends on the available materials and your own wishes. There are many options, among which it is easy to find the most suitable one.
How to make a witch hat with your own hands from paper
The easiest way to make a DIY Halloween hat for girls is from paper. This is suitable for those who need to make a costume in the shortest possible time.
For this you will need:
- thick sheets of paper;
- scissors;
- pencil;
- glue;
- ruler;
- paints and brush;
- beads, ribbons for decoration.
Manufacturing:
- You need to roll a cone from a sheet of paper and glue it to make a cap. You can use a special pattern.
- The brim of the future hat also needs to be made from paper, drawing three circles, two of which will be borders, and the third must be cut. These cuts are needed to connect the top and bottom parts of the headdress.
- The parts are glued together, allowed time to dry and the product is painted black.
Advice! In order not to waste time on coloring, you can immediately take paper or cardboard of the desired color.
- If the color is not saturated enough, apply another layer of paint. You can spray hairspray on top to secure and shine.
- The finished hat is decorated with various decorations - ribbons, lace, feathers, beads, etc.
Paper products are not very durable and most likely the hat will have to be made again next Halloween.
How to make a witch hat with your own hands from fabric
The most common option is to make it from fabric. Almost any textile is suitable for this, just keep in mind that you definitely need a frame that will help keep its shape.
You need to take:
- textile;
- scissors;
- thread and needle;
- wire for frame;
- cardboard for patterns;
- decorative elements.
Manufacturing:
- The first step is to measure the circumference of the head for which the hat will be sewn. Based on the results of these measurements, a witch hat pattern is made from cardboard with reserves of about 1.5 cm.
- Two circles are bent from wire - one along the length of the head circumference, and the other along the outer margins.
- Parts are cut out from the fabric and first the cap is sewn together, and then the brim from two identical parts, attaching wire rings inside.
Advice! If you don’t have wires at hand, you can insert a circle of cardboard into the fields.
- The parts are connected to each other. The fastening area can be covered with a satin ribbon.
- The finished accessory is decorated with buttons, organza, flowers and other decorations.
A textile hat can be used repeatedly.
How to make a witch hat from felt
An excellent option is a felt craft that can hold the desired shape without additional equipment.
To work you will need:
- black felt;
- scissors;
- thread and needle;
- glue;
- cardboard for patterns;
- compass;
- pencil;
- decorative elements.
A hat is made from felt using the same pattern as a fabric one.
Manufacturing:
- Based on head circumference measurements, a pattern is cut out of cardboard.
- The cut out pattern is secured to felt with pins, redrawn and the details are cut out.
- First, the crown is sewn together, and then the brim is attached to it.
- The hat is decorated with ribbons, buckles, small spiders or skulls.
Let's try to sew another version of a fabric hat with a description of the work
If you decide to sew a witch's hat from fabric, it is best to give preference to dense materials that hold their shape well. If desired, the product can be starched or treated with gelatin. Fabrics with a glossy sheen or unusual texture look great.
Necessary materials:
- black fabric;
- cardboard for patterns;
- wire;
- needle and thread;
- scissors;
- wire cutters;
- decorative buckle and ribbon.
Operating procedure.
We measure the circumference of the head and draw a pattern on cardboard. The fields can be of any diameter. We cut two pieces of wire, one of which is equal to the circumference of the head, the other - the length of the hat brim along the perimeter. We close the wire in a circle and twist it tightly or carefully solder it using a soldering iron.
We transfer the pattern to the fabric, adding allowances of 1.5-2 cm for each size. It is necessary to cut out one piece for the crown and two for the brim. We sew the cap together, securing a wire circle of smaller diameter in its lower section. We starch the crown, except for the tip, which will hang down effectively. You can not starch the fabric, but decorate it with folds and secure them with several stitches around the perimeter.
We fold the fields with the right sides facing each other and sew along the contour, sew in a wire circle of a larger diameter (you can replace it with a piece made of thick cardboard), turn it inside out and iron it. We sew the crown to the brim and decorate the product with a ribbon and a decorative buckle. The Halloween witch hat is ready!
DIY witch hat
At the carnival, every participant in the celebration wants to look especially unusual and at the same time elegant. A spectacular witch costume for New Year or Halloween is easy to make. The most noticeable element of a Western witch's costume is a pointed headdress with a dark-colored (usually black) brim. We suggest making a witch hat with your own hands. A witch's hat can be made from either cardboard or fabric.
How to make a witch hat?
You will need:
- large disposable cardboard plate;
- A4 paper;
- black paint;
- water-based acrylic varnish;
- large brush (or sponge);
- glue;
- scissors;
- decorative elements for hat decoration.
Progress
- We make cuts on the plate as in the picture. We roll a cone out of A4 paper and align it. Glue the finished cone to the part from the plate. Let the headdress dry.
- We cover the cap with a layer of paint, trying to paint it thoroughly.
- We wait half an hour until the paint dries, then apply a layer of acrylic varnish. Decorate the hat to your liking. By the way, if you decorate the cap with stars, you will get a quite presentable headdress for an astrologer’s costume.
How to sew a witch hat?
You can make a cute witch hat from fabric. To do this, you need to take a head circumference measurement.
You will need:
- quite dense but soft dark fabric (felt is the best option);
- cardboard;
- glue;
- scissors;
- sewing supplies.
Progress
- We start by constructing a witch hat pattern. It consists of three parts: a cone and fields. Be sure to make small allowances for seams and gluing. We also cut out the fields from cardboard.
- We sew a cone out of felt and trim the bottom edge. We cover the cardboard part of the fields on both sides with fabric parts of the fields. Then we glue the brim of the hat to the cone. It is advisable to age the finished hat a little, slightly crumpling the cone. For decoration you can use dark or bright lace, ribbons, beautiful large buckles, a brooch in the shape of a toad or spider. The latter is easy to make with your own hands, using pieces of black or dark gray fur with large pile for the insect body, and the legs are made from black lace or narrow leather straps.
To decorate the headdress, you can sew a picturesque fringe, an attractive veil or veil along the edge of the brim.
You will need:
- black translucent fabric 1.5x1 m;
- sewing pins;
- rubber;
- scissors;
- sewing supplies.
Progress
- The bottom edge of the product can be left smooth or sharp, torn corners can be cut out. We bend the top edge of the veil by 30 cm. We pin the fold, retreating 1.5 cm from the edge.
- We sew the fold - we get a “drawstring” for the elastic.
- Cut 15 cm from the elastic, making loops on it.
- We thread an elastic band into the finished drawstring using a safety pin.
- The veil is ready! It can be worn under a hat or worn without a hat if it is very hot in the room where the holiday is taking place.
For a witch costume, a girl can sew a fluffy organza skirt, complementing it with a black T-shirt or turtleneck.
To dress up an adult witch, you can also use a black blouse, T-shirt or turtleneck, and for the bottom of the costume any dark skirt (not necessarily black) is perfect.
If you want the image of the witch to be sexy, then for the top, take a black bustier, corset or corsage, and choose a mini skirt. Well-done makeup will make you look like a delightful witch.
Be sure that the eyes of everyone present at the carnival will be turned to you!
Let's make it for Halloween: a witch's hat with a broom. Part 1
It's time to have fun, show off, show off! A carnival hat with a veil is perfect for Halloween, a fun corporate party, and the New Year holidays. And they are just around the corner! Therefore, I offer you a simple master class on making a decorative witch’s hat. MK is suitable for creativity with children. I will try to describe the process in as much detail as possible, so that even a person who has never felted wool before can figure it out.
So, for the first stage (felting the base of the hat) we will need:
- 20 g merino wool (I use 18 micron wool made in Italy)
- a piece of laminate backing or plastic bag for a template
- soap (bar or liquid)
- water container
- a piece of bubble wrap or polyethylene for felting
- stick (or rolling pin, or piece of plastic pipe)
- a tin can or a plastic cup for forming a cap (if desired, you can form it without a “blank” by hand).
Tools for making hats or their analogues can be found in almost every home. You will only have to buy wool for felting (20 g), a veil, an elastic band and feathers.
1. Building a template
First of all, we need to decide on the size of the cap and draw a template.
When calculating the size of the future hat, keep in mind that during felting it will decrease by 1.8-2 times. Therefore, the dimensions you choose (height and width of the crown, width of the margins) will need to be multiplied by 2.
I usually build templates for decorative hats “by eye”, but if you approach the process with all rigor, it should look something like this:
On a sheet of A4 paper, you can build a template in a reduced form, and then transfer it to polyethylene or a laminate backing.
Divide the sheet in half with a straight line. It is more convenient to build half of the template and then cut it out symmetrically. We set aside a segment of 30 cm (in fact, we take half as much so that the drawing fits on the sheet (i.e. 15 cm). This is the middle of the template. From the top point at an angle of about 40 degrees we set aside another segment, the same length as first.
We connect the segments with a smooth line. This is a crown template (half).
Now let's draw the fields. We set aside several 10 cm long sections from our crown and connect them with a smooth line. The angle relative to the crown line is approximately 160 degrees. The result is a “cone with a skirt.”
Fold the sheet in half. Cut it out. And now we have in our hands a template for a wide-brimmed hat. You can draw such a template by hand if you feel the proportions well.
We transfer our template to life-size onto a film or substrate. We slightly round the sharp corner in the upper part - on felting templates there is no need for sharp corners 
2. Layout
Let's start laying out the wool. Lay film or polyethylene on the work table. We put the template. Take 20 g of merino wool.
I unwind the skein of wool and split it lengthwise into two parts.
Since the template needs to be covered with wool on both sides, I take one part on the first side, the other on the second.
We will lay it out in two layers.
I start the layout with a horizontal layer. We lay out strands of wool along our template. On the right and left, the layout extends beyond the edge of the template by 1-1.5 cm. This “spade” allows you to make the product seamless. The strands overlap each other. Each strand overlaps approximately half of the previous one. This allows us to get an even layout without gaps.
A horizontal layer has been laid. We begin to lay the second vertical layer.
Place the first row of strands with the “diffuse” edge up. This means that part of the strand that is placed in your hand closer to the bottom edge of the template. This way the brim of the hat will not stretch too much during felting. We place the next vertical rows as convenient for us. Don’t forget to overlap the vertical rows of strands (the top strands cover the bottom ones by half).
Two layers laid out. Now you need to secure the bottom edge. I don't want it to spread out of control. It’s better to pull it out to the desired width at the right moment. Therefore, I place an additional thin row of horizontal strands along the bottom edge. Like this:
The layout of the first side is completed. Carefully cover the work with a mesh and spray with soapy water.
Gently press the wool with your hands so that it is all saturated with soapy water. We do not move the strands. Just soak the wool well.
When the wool is well soaked, you can very gently rub the mesh with your hand, whipping up the soap scum. Now the fur is a little matted. We can carefully remove the mesh.
Now you need to trim the bottom edge. Carefully fold the edge of the fold up. So that the edge of the template appears.
Now you need to lift the work and, holding it by the template, turn it over to the other side along with the template. We bend the protruding edges onto the template, smoothing out all the wrinkles.
Now you can start laying out the second side. We do everything the same as on the first side. Only now the strands on the right and left no longer extend beyond the edge of the template, but cover our folded edges on the first side by 1-1.5 cm.
When the layout of the second side is completed, we repeat the water procedures: cover with a net, pour in soapy water, press, and rub. By the way, if there is no net on the farm, you can simply pour soapy water over the layout, then cover it with a plastic bag and also press the wool through the bag with your palms.
After removing the mesh (or bag), fold the bottom edge of the layout so that the edge of the template appears. Turn the template over to the other side. And if after laying out the second side there are still protruding edges, wrap them onto the template.
3. Felting
We begin to gently rub our hat with soapy hands. First through a mesh or bag. Then, when the wool stops moving under your hands, you can felt it with your hands. At the initial stage, you can use gloves or simply put a plastic bag on your hand. The fur begins to fall off. You can start rubbing more intensely. When the wool has already adhered well, I remove the hat from the template, reach inside with my hand, and carefully iron the seams.
Then you can roll it, rubbing it with your hands or rolling it on a pipe (rolling pin). You need to roll in different directions. First, screw the hat onto the rolling pin vertically, then horizontally. From time to time I turn the hat inside out and rearrange it so that there are no seams or creases. I collect excess water from my work area with a towel.
During the felting process, you will feel how the felt under your hands becomes dense, and the hat decreases in size. After 30-40 minutes (maybe it will take a little longer for someone who is felting for the first time), the hat will fall almost in half. To speed up the process, you can rinse the cap in warm water (40 degrees) and soap it again. Make sure you don't use too much soap. If you lather the cap too much, it will slide under your hands and you won’t get the necessary friction. 
This is what I got after half an hour:
If you put the rinsed cap on the table, it stands like this:
If you twist it by hand, it practically does not unwind.
Now you can move on to sanding and shaping. First, I want to process the edge of the cap so that it is even. If you noticed, we laid out the wool in the fields in a special way. Thanks to this secret, the fields have already turned out to be almost even. But in order to get a noble edge with a rudder, they can be modified a little more. To do this, I first stretch the margins in width so that they fit well on the plane. It's better to do it now, because... After processing the edges, it will be more difficult to stretch the margins.
Then I fold the fields several times. Like this. I grab it tightly with my fingers at the base. I soap it up and start rubbing it on the bubble wrap.
I repeat several times, folding the fields differently. The result is this smooth edge with a small roll:
Now the hat can be finally rinsed and shaped.
For shaping, I will use this tiny jar of peas (you can buy it at any grocery store). A regular plastic cup or small glass cup will also work.
Pull the cap onto the jar. We spread the fields on the table and smooth them out with our hands.
Now our task is to put beautiful folds on the crown - like a real witch’s hat.
I'm doing it. Then I take off my hat and take it to the mirror. I apply it to myself. I watch whether I like it or not.
You can secure the desired folds with pins. However, they stay on my hat just fine as it is.
In the end, I decided to raise the brim of mine up a little - that way it looks more flirty. The hat holds its shape perfectly even without the jar, so I carefully removed it and set it to dry.
Read how to assemble and sew a veil and decorate our hat with feathers in the second part of the master class.
DIY Halloween Witch Costume
One of the most terrifying holidays of the year is approaching - Halloween. On this holiday, it is traditional to dress up in the creepiest costumes, paint your body and face with scary makeup and go for a walk, on the street or to a nightclub, scare ordinary passers-by, and also have fun and have fun in the company of your best friends.
There are many interesting and colorful options for Halloween costumes - these are vile zombies, mysterious ghosts, mysterious vampires, creepy dead and other equally “attractive” heroes and characters. However, one of the most popular and colorful images for Halloween is the witch.
A witch for Halloween is always a bright and interesting costume that carries with it an atmosphere of celebration and magic, albeit not entirely kind and pleasant, but definitely memorable.
In this article, the News portal “Vtemu.by” decided to share with you ideas for creating an original witch costume for Halloween with your own hands from scrap materials that are sure to be found in every home.
So let's get started...
A witch's Halloween costume consists of several main elements: a hat, shoes, makeup and a broom. As for the outfit itself, it could be a regular black floor-length dress, a short black dress complete with striped leggings or tights, black trousers and a black jacket.
How to make witch shoes for Halloween?
To create these beautiful and spectacular Halloween witch shoes, you will need a pair of old shoes.
To make an unusual nose for shoes, use the usual papier-mâché technique. From a sheet of thick cardboard, cut out the tip to the required length and glue it to the toes of the shoes. Then cover all the shoes with scraps of newspaper so that the witch’s shoes have a smooth surface. Make several layers of newspaper pieces, and the last layer is made of white paper.
After some time, after the shoes have dried well, use black paint to paint the shoes. For greater effect, you can decorate the finished shoes with sparkles, bright orange plaques and charming spiders.
How to make a witch hat for Halloween?
To make a colorful witch hat for Halloween, you will need a sheet of thick cardboard. From cardboard you cut out the cap and brim of the hat (see photo).
Both parts must be secured together. This can be done with glue or double-sided tape.
Now you can start painting. It is best to paint the hat black or make it striped (orange and black). If you have sewing skills, then draping a hat with fabric would be a great option.
After the hat is ready, you can begin the most enjoyable activity, decorating the hat. Decorate your witch hat with beautiful decorative strands, faux webs, buckles, themed messages and ribbons.
How to make a witch's broom for Halloween?
What's a witch without a broom?
To make a real witch's broom you will need the following materials: a regular broom, a shaft, a sheet of thick cardboard and wire.
If you do not have a ready-made broom with a long shaft, then without much difficulty you can make a broom from an ordinary broom. Using strong wire, tie the broom to a wooden shaft, and mask the junction of the broom with the shaft with a cardboard cap.
Decorate the finished broom with artificial cobwebs, decorative ribbons, braid and thematic inscriptions.
Halloween Costume: DIY Bats Hairband
Halloween makeup: photos and ideas. How to paint your face for Halloween?
Halloween costume. DIY Halloween costume
Source: https://vtemu.by/novosti-v-temu/kostyum-vedmy-na-xellouin-svoimi-rukami/
DIY Halloween Decorations – Witch Hat ·
One of the decorations for Halloween or another themed holiday can be a witch's hat. You can do this craft with your children; they will be happy to take part in preparing for the holiday.
We will need:
- felt (not necessarily black);
- ribbons;
- needle and thread;
- scissors;
- glue;
- compass;
- paper.
Progress
On paper you need to draw and then cut out the pattern of the future witch's hat. The sizes may be different, it depends on what you are making the hat for.
Let's start sewing the crown of the hat - the cone. It is necessary to sew end-to-end, trying to make the stitches unnoticeable.
We make cuts in the center of the hat brim detail.
Using glue, glue the crown to the brim of the hat, using the cut parts of the brim.
All that remains is to decorate the witch's hat. You can use a ribbon to make a hat strap. It can either be sewn on with threads, or glued with glue or a glue gun.
How to Make a Pointed Witch Hat for Halloween
Hi all! Halloween is approaching, and for this celebration I needed a pointy hat. I tried to make it myself and now I’ll tell you exactly how.
What we need:
- Cardboard A2
- Paper or newspaper spread
- Thick fabric (approx. 1 - 1.5 m, I took black for the base of the hat) and red linen fabric for finishing (approx. 60 cm), you can take a regular satin ribbon, at your discretion.
- Threads
- Needles
- Pins
- Chalk
- Tape measure
- PencilFelt Pen
- Scissors
- Ruler
- Compass
- Sewing machine (you can sew by hand at your discretion)
Step 1. Pattern of fields:
We measure the diameter of the head at the level where we are going to wear the hat. I got 53 cm. Divide 53 by 3. It turned out to be approximately 17 cm. I take a newspaper and draw a circle with a radius of 17 in the middle with a compass.
Next we draw the brim of the hat. I wanted to make fields of approximately 12 cm each. We measure 12 cm from the already outlined circle and build a new one. We cut it out, what we get looks a bit like a tire.
You can make a pattern directly on cardboard, but this was my first time doing this, so I decided to play it safe in case the opening for the head turns out to be very large or vice versa.
Next, we transfer the pattern to cardboard and cut it out too. The brim pattern is ready.
Now we will again need the measurements we made at the beginning. My head diameter is 53 cm + increase of approx. 2 cm = 55 cm. Draw a figure similar to a triangle.
When everything is ready, you can cut it out.
p.s.: it’s not entirely clear in the photo, you need to retreat 3 cm on both sides from the middle of the cone. top width = 6 cm.
Step 3. Fields:
We take the brim pattern and transfer it to the fabric with an increase of approx. 1 cm in the opening for the head and on the large circle too. You need to make 2 fields (bottom and top).
Fold the fabric so that the right side is inside. To make it easier for you, you can attach a cardboard pattern and mark its location inside with chalk.
We fasten with pins along the chalk marks and go to the sewing machine, you can sew the fields on your hands, everything is at your discretion
