General design tips
Before we begin considering specific decor ideas for a child’s birthday, let’s pay attention to the following points:
You can create an atmosphere of celebration in the house if a boy turns 1 year old using a certain color scheme (white, blue, light blue and green tones) and attributes characteristic of the life of young hooligans (cars, balls, robots, etc.)
First you need to decide on the room where the celebration will take place.
If a girl is celebrating her first birthday, it is better to use pink, red, white and gold to decorate the room. Suitable decorations include bows, dolls, natural and artificial flowers, castles or other items that are associated with little princesses.
Since the main hero of the occasion is turning 1 year old, decorations must meet the following safety requirements:
Room decoration
The festive mood begins with what we see around us. That's why we pay a lot of attention to interior design.
Balloons are the easiest and most affordable way to decorate a room for a child’s birthday.
Decorating the walls and ceiling
To decorate the walls, you can use garlands made of paper, balls or ribbons. Various panels and collages, greeting posters and banners also look good.
Garlands can be made from anything: from yarn, from fabric, from colored cardboard, from toys, or simply from whatever your imagination tells you.
A great idea for decorating the ceiling is paper or satin ribbons extending from the center to the edges. To complement the composition, use balloon flowers, chaotically located paper pompoms, suspended at different heights.
Ceiling decoration with colorful ribbons and balloons
Design ideas
Before decorating a room for a one-year-old boy, you should decide on a theme.
Fairytale castle for the little prince
For a pirate ship you need corrugated cardboard - large packaging boxes from a refrigerator or TV
Stars can be cut out of foil and glued to cardboard
Saving and Printing
Then you need to save your work. There are 2 ways:
Save the poster as a JPEG image
You can also send the poster directly for printing. Do this by clicking the “Print”
. In the window that opens for selecting parameters, specify the desired printer, format, orientation, resolution and send for printing.
If you wish, you can print the poster on your home printer
We make decorations ourselves
The table contains several options for DIY decorations for a one-year-old child:
| Decoration | Necessary materials | Time spent on production | Where to place the decoration |
| Flat digit | Thick cardboard, paper (corrugated, tissue, double-sided colored or napkins), scissors, glue stick, thread | Depends on the size of the number and paper pompoms: from 2 o'clock (about 50 cm) to 5 | Wall, coffee table |
| Child's name | If the name has 4-5 letters (height up to 30 cm), it will take from 5 hours | ||
| Volumetric figure | From 6 hours | Floor, coffee table | |
| Paper flowers and pompoms | Corrugated or tissue paper, scissors, thread | 1 pompom – 5 min 1 flower – from 10 min | Walls, ceiling, curtains |
| Collage of photos | Printed photos of the baby (can be black and white), cardboard (in accordance with the overall color scheme) for frames, glue | In the form of a train In the form of a clock (placing images of a child from 1 to 12 months in the appropriate places) | Walls |
| Balls of thread | Balloons, cotton threads, stationery glue | Creating one ball will not take more than 20-30 minutes, but for it to dry completely you need to wait at least a day | Ceiling, curtains |
| Congratulations poster | Whatman paper, pencils, felt-tip pens, paints (watercolor or gouache) | From 1 hour | Walls |
| Garland of flags | Colored paper, glue, scissors (can be curly), thick thread or fishing line, felt-tip pens | With a garland length of 2.5 m and a flag width of 25 cm - from 1.5 hours | Walls, curtains, ceiling |
| Balloon decorations | Balls of various colors, sizes and shapes, threads, scissors, double-sided tape | Possible options: garland - from 40 minutes; flowers - from 15 minutes (depending on the size and configuration of the composition) |
Fairytale tree made of large branches painted with black paint
You can make the listed room decorations yourself using what every housewife always has on hand (scissors, paper, glue, thread). In this case, the options proposed in the table can be combined. For example, draw a congratulatory poster and stick photos and decorative elements (pompoms or flowers) on it, place family photos on the garland flags, etc.
However, you should start making such elements several weeks in advance (balloon compositions and garlands do not count). As you can see from the table, each decoration made by hand does not take much time, but if you calculate how much is needed to decorate an entire room, you get impressive numbers.
To decorate your baby's room, you don't have to come up with overly complicated decor.
Setting the Page Format
Decide how and where you will place pictures, captions, and decorative elements. Specify the canvas size by clicking on the Page Format
. In the parameters window that appears and in the drop-down list, find the one you need. Recommended parameters: 1280*1024 and 1920*1080. This size corresponds to the standard resolution of monitor screens and you will be comfortable working on the project. Afterwards, the poster will fit perfectly as a screensaver on your PC or laptop.
Customize the poster format
What to do if there is no time?
When there is a one-year-old baby in the house, it is unlikely that parents have a lot of free time to create decor with their own hands. In this case, you can turn to the following options:
Simple balloon shapes
Foil balloons are more durable, hold their shape well and are not afraid of children's hands
Paper balls can be mounted on the wall or simply scattered on the floor
Important! When decorating the interior with balloons, use 2-3 colors. A monochromatic design looks boring, but if you use 4 or more color schemes, it will turn out too bright.
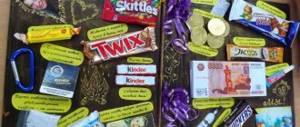
The holiday will become even more interesting if guests also receive small gifts. You can put sweets, cakes or small toys in surprise boxes
Decorating a children's holiday table
Let's look at a few decoration ideas that will help delight not only the child and his guests, but also adults.
Decoration of festive dishes
For a children's party, mother should show all her imagination. For example, ordinary vegetable, meat or cheese slices can be laid out in a herringbone pattern, sandwiches can be decorated in the form of ladybugs or animal faces. We offer several table decoration ideas.
To decorate your holiday table, you need to choose a specific theme or style, for example, your favorite fairy tale or cartoon.
Sweets on skewers
To decorate a children's table in an original and quick way, you will need:
Prepare wooden skewers, sweets and rubber gloves
Important! Use small and medium sweets - too large and heavy ones may not fit on the skewers.
Place the sweets on sticks; for large marshmallows, you can take two skewers
Collect a bouquet of different sweets and place it in a vase
Once you have everything ready, place the treats on skewers and place them randomly in the vase. If the dishes are transparent, first put sisal or organza in it that matches the color scheme of the rest of the decor. This way beautiful and delicious “fireworks” of your favorite sweets will appear on the table.
Bouquet of fruits and berries
To make the decorations on your table not only tasty, but also healthy, make a bouquet of your favorite fruits and berries.
For this you will need:
Cut the prepared fruits (washed and dried) into slices or make shaped decorations using special molds.
A fruit bouquet will decorate the table and fill the room with a fresh aroma
Place the orange (grapefruit) in a basket, securing it with toothpicks on several sides, cover it with lettuce leaves, thus covering the base. Then place the prepared fruits and berries on toothpicks one by one, and attach them to the base in a circle, starting from the bottom row. The resulting composition can be supplemented with sprigs of rosemary, tarragon, mint or lemon balm.
Important. This decoration is not recommended to be done earlier than 2-3 hours before the start of the holiday.
Multi-colored glasses
When there is little time left for design, you can use a quick but very effective method. In martini or cognac glasses, pour colorful dragees (for example, sea stones, skittles, M&M's) or small gummies in the shape of animals and berries.
Multi-colored dragees in a glass
Distribute the glasses evenly on the table. All children will definitely like this decoration, and it won’t take you even 10 minutes.
Toppers
A great way to add variety to the children's table. You can use ready-made ones or make your own from paper. Find bright, colorful pictures of cartoon characters, cars, booties, soccer balls, etc. on the Internet. Toppers in the shape of the number 1 are perfect for a child’s first birthday. Using any graphic editor, “cut out” images in the shape of a circle, oval, square or rectangle and print them on a color printer (choose thick paper). Glue the finished templates together in pairs by inserting a toothpick or a small skewer between the two images (depending on the desired height of the decor).
Paper toppers are suitable for decorating cake or pastries
Toppers can be used to decorate cakes, cupcakes, or combine them with other decorations, for example, insert them into a fruit bouquet or a vase of sweets.
Table setting
Please pay attention to the following nuances:
It’s more convenient and safer to set the table with plastic and paper dishes, because they won’t break or hurt anyone
Decorating the space next to and above the table
To complete the design of the dining area, take note:
Ribbons tied in a bow - a simple and effective decor for the backs of chairs
An idea for decorating the wall above the table is a photo collage made of wooden frames, inside of which pictures of the most interesting moments of your baby’s life are hung on a fishing line.
Important! All decorative elements in the festive table area should be located so as not to interfere with guests.
So, to decorate a room for a 1-year-old child, you may need: garlands, balloons, three-dimensional numbers, flowers, improvised cardboard structures and limitless imagination.
There is no need to overload the children's room; it is better to decorate the living room or dining room if there are guests
Having decorated the room and set the festive table, do not forget about the musical arrangement. Children's songs will be a great addition to your baby's first birthday party!
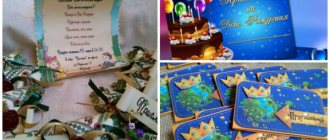
Posters "My first year"
1 year... What does this period mean for you. For most, this is not such a long period of time, but for a baby it is a whole life, especially if the child is one year old! So why not preserve the memories of your baby's first year by making "My First Year" posters ?
Of course, you don't have to create a poster just for the first year. You can make as many posters as the child is old to track his biography. The “My First Year” poster will contain photographs of your child by month or by important events in his life.
How to do it? This is easy to do - just select a suitable template on our website and attach important photos. All that remains is to print and hang the received “My First Year” posters!
Poster “My first year” No. 1
Poster “12 months” with photographs of your baby from birth to one year.
The poster is made in soft pink colors, suitable for a girl. Photos of your daughter will be placed in unusual frames in a sunny flower meadow along with funny cartoons.
Poster "12 months" No. 2
Poster "12 months" with photographs of your baby from birth to one year. Photos of your baby will be placed on a bright blue background, with funny cartoon characters. In the corner you can write the date and time of birth of the baby, height and weight at birth.
Poster “My first year of life” No. 3
Poster “My first year of life” with photographs of your baby from birth to one year. Photos of your baby will be placed against a joyful summer background, with funny cartoon characters. The month is indicated under each photo.
Poster “My very first year” No. 5 with Peewees
Poster “My very first year” with photographs of yours from birth to one year. Photos of your baby will be placed in square frames with adorable toddlers against the backdrop of a summer meadow.
It is very convenient to observe on this poster.
Poster “My first year No. 6
Poster “My first year No. 7
Poster “My first year” with photographs of your child from birth to one year.
Photos of your baby will be placed in yellow slide frames with funny characters. The “My First Year” poster is suitable for both girls and boys. 350 rub.
Poster “I’m 1 year old” No. 8 for a boy
Delicate poster “I’m 1 year old” on a blue background with photographs of your baby from birth to one year. Photos of the baby will be placed in pearl frames with wonderful decorative elements, a stuffed bunny and flowers.
Very comfortable on this poster.
Poster “I’m 1 year old” No. 9 for a girl
Delicate poster “I’m 1 year old” on a pink background with photographs of your baby from birth to one year. Photos of your daughter will be placed in pearl frames with wonderful decorative elements, butterflies and flowers.
How to make a birthday card with your own hands
A baby's first birthday is certainly an important and very exciting event, especially for the mother! I would like to celebrate it beautifully and cheerfully, and preserve wonderful memories for life!
What mothers don’t invent! They order incredibly beautiful cakes, decorate candy bars, arrange festive photo shoots, and decorate the house with fancy balloons and Chinese lanterns.
One of these decorations, which is very popular nowadays, is voluminous figures!
They take pictures of the child and the whole family, decorate candy bars and simply leave them as a souvenir.
This figure can be ordered from craftsmen or companies that organize events.
Plus, you can make it yourself! To do this, you do not need to have special skills and abilities, you only need desire, a great mood, the necessary materials and 19-20 hours of free time
Yes Yes. This process is certainly fascinating, but also very lengthy! So it’s better to start preparing for the birthday in advance!
We have prepared for you a detailed master class on how to make such a unit and we are in a hurry to share it!
Photo madness
Young parents usually take a lot of photographs of their child under one year old. We use these photos to decorate the holiday and entertain guests.
When I was preparing to write an article, I looked through a huge number of hand-made wall newspapers that mothers designed for their one-year-old children. Amazing imagination and golden hands, you can easily find the pictures.
Here are ideas for wall newspapers:
- a train and 12 carriages with a photograph of each month of a child's life
- palm tree showing height and weight
- the carriage in which the birthday girl rides
- starry sky (naturally, all photos are cut out in the shape of stars and the birthday boy is in the rocket)
- a balloon on which the hero of the day flies
- photo in the center of the flower, in the egg (instead of the chicken)
- 12 photos of a child on a watch dial
- film with frames
- calendar (photo of each month)
For me personally, designing a wall newspaper is too time consuming, so I make computer photo presentations.
Presentation topics:
“Everyone is 1 year old!”
(find photos of yourself, photos of your brothers and sisters, photos of your parents, uncles and aunts with only one-year-old children). Firstly, it's fun, and secondly, it's easy to find out who looks like whom. For example, here’s how my husband’s nephew looks like his uncle (40 years between photo sessions).
"How I grew up"
(here collect the best shots from the maternity hospital to today)
Another option to impress your guests!
I’ll say right away that it took me a LOT of time to create such a tree, but not only I, but also everyone who was directly involved in the birth of my Katyusha, was happy with the result. I found a photo of great-great-great... who were born in the 19th century seven generations ago. From experience I can advise: do not take photos of brothers and sisters! Nobody's! Here it is important to gather exactly those relatives, without whose participation your child would not have been born.
Just imagine, two families (from mom and dad’s side) united in one branchy tree thanks to a little man... I’ll say right away that I don’t have a template, I drew it in Photoshop from scratch. The finished version also contains oak leaves. I removed them so that it would be easier for you to see the essence of the tree. Relatives of the same generation are connected by thin lines, it’s clearer this way.
Here’s something a little more expensive: souvenirs are ordered with the baby’s image (some of it goes towards gifts and prizes for guests): key rings, cups, T-shirts, plates and pillows, calendars and notepads. By the way, you can simply enter the child’s name into the finished design.
Another option that will delight all guests is posing on a rocking horse. Hint to your relatives, let someone give the baby such a gift (by the way, the tradition dates back to the time of Peter I, on such a horse the prince was jokingly dedicated to the military commander of all Rus'). My son looks so impressive! Photo from an old phone, sorry for the quality :-).
Fashionable candy bar
If you find a place in the room that the baby can’t reach, I highly recommend setting up a festive sweet table. There are color options for boys and girls. Of course, we won’t offer any of this to children, but it’s so beautiful... You can easily find many examples of thematic design specifically for the first birthday. .
It is both a decoration and a treat. If you are in Moscow, call us, we will do everything in the best possible way :-). Here are examples of our decorator’s work (general design and candy bar in the same style):
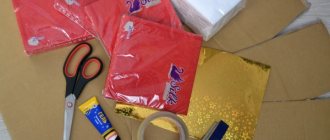
Making a frame from cardboard
First, let's make the frame of our number.
and the photo below shows all sizes. I have this template on ordinary cardboard.
In this MK we use a cardboard box from IKEA for the frame. (It is quite durable and can withstand falls and other incidents) But an ordinary cardboard box will do.
The frame can also be cut from polystyrene foam or polystyrene foam. Or buy ready-made!
We cut out 2 such blanks (front and back sides) and sides 10 cm thick.
Be sure to label the sides so you don't get confused when assembling the frame.
We assemble the frame using masking tape.
The joints from the inside must be coated with hot glue! This way you will be absolutely sure that the figure will be strong, nothing will fall off and even falls will not be scary for it!
Glue the front side of the number to the sides with hot glue. And additionally fix it with masking tape.
And this is what we got
The frame is ready! You can start decorating! And this is perhaps the most enjoyable process. Since it depends entirely on your imagination. In this master class we will decorate a piece with corrugated paper using the trimming technique!
First, cover the back of the number with paper. The paper needs to be stretched first (this will make it easier to stick). Glue with hot glue or double-sided tape.
(In principle, you can skip this step. This part of the number will not be visible in the photo!
How to decorate a number
Corrugated paper
When the frame is ready, we begin to prepare the pounds. We take paper and cut it into strips 5 cm wide. The photo shows that the paper has stripes. These are the ones you need to cut along. The width of such strips will be just 5 cm!
We stretch them thoroughly (the length of the strip will almost double!) and cut into squares 5 x 5 cm.
We will glue using the trimming technique.
We take a pencil and wrap our square around it, like this. It turns out to be a pound
Apply a drop of hot glue to the tip and glue it to the number.
And here is the finished result!
But what to do if you can’t find suitable paper?
You can take the simplest corrugated paper, which is sold in almost every office supply store. The funnels from it will turn out fluffier. Here is an example of a unit made from such paper!
From napkins
But there is an even simpler option! Decorate the number with roses from napkins!
The better the quality of the napkins, the more beautiful the number will be! But even the simplest results will pleasantly surprise you.
Here is an example of a number decorated with napkins!