What can you use to make a one year old unit?
There are many options for making figurines in the form of the number one to decorate the venue for a baby’s first birthday.
For this the following can be used:
- balloons;
- cardboard;
- corrugated paper;
- flowers;
- textile;
- napkins.
And some mothers prepare a birthday cake in the form of a single cake.
What sizes to choose
The choice of size depends on the availability of space in the apartment. The average height of a single unit is usually from 0.5 to 1.5 meters. This figure can be used as decor for a room or hall in a cafe where the celebration will take place.
If the dimensions of the room do not allow the use of a structure of this size, then you can make a smaller unit with a height of 20 to 60 cm and place it in the center of the festive table. Also, small ones folded from napkins will look beautiful on the table.
Frame
The basis of such a craft is an internal strong structure, which ensures durability, allowing you to construct any shell on yourself.
The best option is cardboard, secured with glue, fishing line, tape or paper clips. It will not fall on its side or fall apart in parts if you make numbers with step-by-step instructions.
You can print a very small form yourself by downloading sketches via the Internet. But it’s much more interesting to give the workpiece a large size, for example, a meter or 2 from the floor.
- DIY pots: how to make a flower pot and the best decor ideas. 130 photos and tips for beginners
- DIY boat - interesting ideas on how to make a boat from scrap materials (100 photos)
- Do-it-yourself dolls - the best ideas on how to make stylish, beautiful toys and step-by-step instructions on how to sew a doll (110 photos)
Plan for creating a 1-1.5 meter frame:
- There are 2 ways of the initial stage: using a printer, prepare a pattern or manually draw the required shape of the decoration.
- We cut out and glue all the parts together, leaving no gaps, or connect them with tape.
- We attach the finished template to the cardboard and cut out 2 identical numbers.
- For a three-dimensional figure, it is necessary to make more connecting parts from the required material.
- We logically put all the parts together.
The frame is ready, all that remains is to make the numbers with your own hands (if the child is under 10, then 1 figure) and give it a beautiful appearance.
From foam plastic - how to make
A do-it-yourself number 1 for a year old, made from polystyrene foam, will be voluminous and will help decorate a room for a party, a photo zone or a garden area if the event is held outdoors. To make it, it is most convenient to use a sheet of thick foam plastic.
A number is cut out from a sheet according to pre-prepared sketches, which is then decorated in any convenient way.
For decoration, corrugated paper, flowers made from napkins or using scrapbooking techniques, etc. are used. In this case, you will still need to work hard to create beautiful flowers, of which you will need a lot. If there is very little time left before the event, then the number can simply be covered on all sides with fringe or paper with a beautiful pattern.
Cardboard unit: step-by-step instructions
The easiest way to make a flat figure is to use ordinary cardboard. For this purpose, an ordinary cardboard box is suitable, on which the outline of the number is applied, and then it is cut out with sharp scissors. Decorate in any convenient way. At a minimum, it is painted with paints, wrapped in foil or covered with beautiful bright paper.
The creation will become even more festive if you attach a crown, flowers, butterfly figures or any other decoration to the top of the figure. If it is a boy’s birthday, then it is customary to decorate the number with drawings or figurines of airplanes, ships or cars. This decor is easily attached to the wall, curtains or to the birthday person’s chair using double-sided tape.
A three-dimensional unit will look much more attractive. First, a frame is made, which will then be decorated. Thick cardboard or large voluminous boxes are used for the frame.
Next you need:
- Make a template by drawing a layout of the future number on paper. It is best to use a sheet of notebook paper or special paper with markings. In this case, you should take into account the scale of the product, its height and width.
- The figure is transferred to cardboard, having previously increased it. Exactly the same figure, only in a mirror image, should be cut out from another piece of cardboard.
- To make the structure stable, you need to make a bottom . In this case, you should take into account the parameters of the figure (its thickness and width). The wider they are, the more stable the unit will be, however, it will also need more decor. If the figure is planned to be hung on the wall, then the thickness can be minimal. In this case, the length of the bottom should be the same as the width at the bottom of the number.
- Using paper and glue or tape, attach the bottom to one of the sides of the figure . Such manipulations can only be carried out from the inside of the future unit.
- After this, you can glue the second half of the number using wide tape, further strengthening the fold line .
- The top of the structure is made in the same way .
- Using tape, connect all parts of the figure between themselves (top and two sides).
- To keep the frame strong, all external folds should be taped .
- Finally, all sides are closed . It is important that the dimensions of all workpieces correspond to the dimensions of the bottom.
If everything is done correctly, you will end up with a beautiful three-dimensional unit that can be used to decorate a holiday room.
Five packs of napkins turn into a masterpiece in two hours! Cool, so bright and festive
Decor Lifehacks Holidays Handicrafts Handmade
Children's parties have a special atmosphere. They are bright, with a lot of goodies, filled with fun and warmth. One day I wanted to make a unicorn-themed birthday party for my daughter. And I did it! In fact, everything is not as difficult as it seems.
Fantasy can work wonders if you have ideas that you want to realize. After my first success, I was lucky enough to decorate the birthday of one friend, a second, a third... So decorating holidays became my hobby and additional income.
The baby's very first holiday requires special attention. Some parents choose expensive restaurants and invite many guests. Others, of whom I also belong, opt for a cozy home photo shoot. For such a celebration, I recommend using a minimum of decor.
In this article I will tell you how to make a number from napkins with your own hands . It looks impressive on camera and is very easy to do.
How to make a number from napkins
First, decide on the size you need. Draw a model of the number on cardboard. Prepare the surface for work and all the necessary materials. I recommend choosing polystyrene foam as a base. You can glue a frame from cardboard boxes, but it takes much longer.
- sheet foam
- corrugated paper or napkins
- stationery knife
- scissors
- stapler
- glue gun or PVA glue
- scotch
You can buy polystyrene foam at a hardware store. It's called thermal insulation foam. It comes in different sizes - from 50 to 200 centimeters in height. For optimal volume, use two identical sheets. For a figure one meter high, you will need at least five packs of paper napkins.
- Redraw the layout of the numbers onto foam sheets and connect them together with double-sided tape.
- Fold the napkin in half and cut it to form a two-layer square. Fold this square 2 more times and staple it in the center with another similar one.
- Transform the finished multilayer squares into circles with scissors. Make notches around the circumference and fluff them up.
- Attach the resulting flowers to the foam figure using a glue gun. If you use PVA glue, first apply it to the entire surface of the number. Next, spread glue on each flower.
- Decorate the number all around, even on the back! Do not leave large gaps, glue the flowers closer to each other.
Number 1 made of fabric: master class
You can sew the number 1 for a year old with your own hands.
For this you need the following materials:
- beautiful fabric;
- filler (this can be synthetic winterizer, cotton wool, foam rubber, etc.);
- needle and thread or sewing machine;
- scissors;
- chalk for marks.
The process for making such a figure is as follows:
- First you need to decide on the size of the future unit . You can draw the layout yourself on a large sheet of paper or print it on a printer. After which it is transferred to fabric folded in 2 layers.
- After this, you need to cut it out , not forgetting the allowances necessary for sewing together individual parts of the figure.
- Additionally, the sides are cut out .
- When all the parts are ready, you can start sewing . It is more convenient to start from the bottom. In this case, the seam that connects the front and side parts will be less noticeable.
- Next, you should sew on the back , leaving one side unsewn. Through this hole the unit will be turned inside out and then filled with filler.
- Before turning the number inside out, you need to make small notches . Thanks to this, there will be no folds or thickenings at the edges of the figure, and the piece itself will be smooth on all sides.
- After turning the number inside out, you can start filling it . This must be done tightly, compacting the material chosen for this inside. It needs to be kneaded periodically to prevent lumps from forming.
- When the number is completely filled, you need to sew the remaining hole using a blind seam.
- Finally, the piece can be decorated with ribbons, lace , buttons, beads or any other decor.
Corrugated paper decor
Having made the number 1 for a year with your own hands, you need to take care of its decoration. The easiest way to do this is to use corrugated paper. Many squares of the same size are cut out for it. The base of the number, on which the pieces of paper will be glued, is smeared with glue. Using a regular pencil, flowers are formed.
To do this, a piece of paper is wound around it so that the pencil core is in the center. The bottom of the flower is dipped in glue and glued to the number, while carefully straightening the edges. You need to pay attention to the fact that the petals should cover the entire surface of the unit. But there is an even simpler way to decorate. To do this, strips are cut out of paper.
At one edge of each strip, cuts are made in the form of a fringe. This fringe is glued on starting from the bottom edge. When gluing the first strip, glue is applied to its entire surface. After the first strip is glued, you need to make a small indentation on top, where the second strip is glued. It is important that each subsequent strip completely overlaps the top of the previous one.
Periodically, the color of the stripes needs to be changed to make the figure more attractive and festive.
Origami paper number, method 2
Another option for designing numbers from colored paper is also quite simple, and no worse than all the previous ones. But it takes a little longer than the others. We cut colored paper into squares, approximately 10x10 in size, from which we will twist roses. For variety, you can combine several sizes in a figure: 15x15, 10x10, 8x8. And stick them up in a chaotic order. So, we have a square, we begin to cut out a spiral, all the way to the center, we will get a kind of twisted ribbon in a spiral. I advise you to make the size of this tape no more than 1.5-2 cm. You need to look according to the size of the square, if it is 15x15, then the tape can be made 2 cm, if less, then the tape should be narrower accordingly.
Next, without thinking about beauty, we twist our flower, starting from the middle, don’t be afraid and twist it more tightly. When you open your fingers, the flower itself will unwind to the desired size. Then we apply glue gun to the very center - the circle - and glue it to the number. For comfort, it is better to glue on the number in a lying position.
Napkin decor – flowers
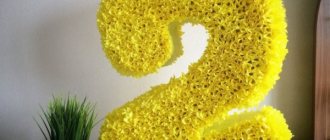
The number 1 for a year old, decorated with napkins with your own hands, looks very beautiful and lush. To make it you will need colored napkins and patience. For flowers, only single-layer napkins of different colors are suitable. The napkin is folded in half. There is no need to unroll it first. In the middle, the workpiece is fastened with a stapler.
Thin wire can be used to secure the base of the flower. Using scissors, trim the edges of the napkin to make a circle.
The top layer of the napkin is carefully collected so that petals are formed. Gradually, all subsequent layers are formed in a similar way. After all the edges of the napkin are raised, the petals are carefully straightened. Using a glue gun, all the flowers from the napkins are glued to a pre-prepared piece.
Decor using scrapbooking technique
One of the options for decorating a figure is scrapbooking. To do this, you will need wet wipes that are pre-dried.
In addition, the following items are used:
- stencil for forming a flower;
- wet wipes that have already been pre-dried;
- scissors;
- paraffin candle;
- glue gun;
- paint of a suitable color;
- artificial stamens.
Using a stencil, several blanks are cut out. If several stencils are used simultaneously, which are slightly different in size, then the finished flowers will look like real ones. To make the buds look as realistic as possible, it is recommended to make their edges not entirely even.
Paint is diluted in a small container and the pieces are lowered into it one at a time. Each painted piece is wrung out and dried. To make the process go faster, you can use a regular hairdryer. Before collecting the petals to form a bud, their edges should be scorched by holding them over a burning candle, bending them into the center. A hole is cut in the center of each workpiece.
They take several pieces together, put them together, their edges are straightened, and the prepared stamen is placed in the middle. It is not at all necessary to cover the entire blank of a unit with such colors. You can simply glue several flowers in the middle, making a composition out of them. The rest of the surface of the figure can be decorated using any other decoration technique.
Options for decorating numbers with step-by-step instructions
When the base is prepared, you should choose one of the options for decorating the product. When choosing a decoration method, it is better to rely on your own capabilities, the availability of necessary materials nearby, as well as the age, gender, and preferences of the birthday person.
It is worth noting that the decor will largely depend on the shape of the product (flat or volumetric figure). We hope that from the presented options you will find something you like.
Unit for a boy - how to make
To make a one for a boy you need to take:
- corrugated paper;
- silicone glue;
- cardboard;
- double-sided tape.
Process of creation:
- Make a three-dimensional unit out of cardboard.
- Cover the finished figurine on all sides with blue corrugated paper.
- Cut out 5x5 cm squares from paper.
- Using a pencil, make a tube from each square, which you then glue to the number. Thus decorate the entire unit.
- Decorate the figurine with a bow tie, figurines of a car, airplane, or other decoration that the birthday boy will like.
Unit for girls - instructions
You can decorate your little one's birthday suit with fabric to match her dress. To do this you will need cardboard, fabric, a silicone glue gun, scissors, a pencil and a ruler.
You need to do the numbers as follows:
- Make a unit template from cardboard.
- In order for the fabric to lay beautifully on the base, the width of the cut should be 3 times larger than the width of the number.
- The base of the figure is smeared with glue and, forming arbitrary folds on the fabric, it is glued to the figure.
- In this way, the entire front part of the figure should be decorated.
- After the front part is ready, the fabric is carefully wrapped and its edges are glued to the back of the figure.
Textile
If you're planning an outdoor holiday party and you're worried about rain or just aren't a fan of paper crafts, you might want to check out these amazing ways to decorate with fabric.
Butterflies made from bows
This wonderful way to decorate a birthday number not only looks creative and stylish, but is also very easy to do:
- Take the fabric of the desired color;
- Cut the fabric into medium-width ribbons;
- We tie the ribbons into bows (you should not make too long narrow ribbons, as the bows may turn out “sluggish”);
- We attach the bows to the base of the number with hot glue (you should first cover the frame with fabric to match the color of the bows so that the cardboard does not show through them).
Your number will look as if a flock of colorful butterflies is sitting on it.
Fringe of thin ribbons
You can decorate your figure with thin and short ribbons, making a fringe from the ribbons. To do this, you need to tie a knot in the middle of the tape and glue it to the base. It is worth noting that the knots must be close to each other to create a continuous multi-colored fringe covering.
Satin flowers
This option looks amazing and is quite easy to make. Step-by-step manufacturing instructions:
- Cut out 3-4 circles from satin fabric (satin ribbon) (each should be slightly smaller than the previous one);
- We light a candle, lightly scorch the edges of the fabric circles with its flame so that they do not fringe and look like flower petals;
- Place the petals one inside the other so that the smaller one is in the center;
- You can stick a safety pin inside the resulting bud, attaching them to the frame (it’s most convenient to use a foam base).
Threads
To create this original birthday look, you will need a cardboard base and a ball of thread. To create it, you need to take threads, secure them to the base with double-sided tape or PVA glue, then wrap them generously around the figure so that the cardboard gaps are not visible. You can give complete freedom to your imagination: use different colors, in any quantity and sequence, create patterns or even inscriptions from threads. You can use gradient threads (changing color as the ball unravels).
Another interesting option is to create a number by weaving threads around small nails driven into a wooden plank. Carnations form the frame of the number, and with the help of threads its outline and internal color filling are created. In this case, you get a real painting made with your own hands.
Other materials
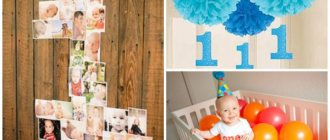
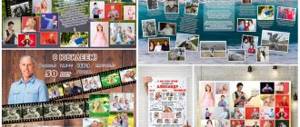
A wonderful number decor can be made from family photographs depicting the birthday boy and his loved ones. This is one of the simplest, brightest and most emotional options in our selection. All you need to do is glue real or printed and cut out photos onto the frame.
You can even pin photos to the wall with pins in the shape of a number. The main thing is to choose truly happy and joyful pictures, where there is a smiling birthday boy.
You can make a number out of what your child is interested in. For example, create a base from a Lego constructor, decorate it with balloons, fresh flowers, buttons, stamps, coins, using the papier-mâché technique, using dry leaves or flowers (if he likes to collect them for the herbarium). The main thing is a creative approach, the desire to surprise and please a loved one. By the way, both children and adults will like this gift.
A DIY number would be a great birthday gift for a parent, brother, sister or close friend.
Balloon unit
All kids are simply crazy about balloons, so they will be delighted with such a one.
To do this you need to prepare:
- 52 balls, no more than 10 cm in diameter, of one color and 36 of another shade;
- pump for inflating balloons;
- fishing line for tying inflated balloons.
The process of making a figure is as follows:
- Inflate all the balloons so that they are the same size.
- Tie each of them.
- Tie 2 balls of the same color together.
- Connect 2 pieces together by twisting. This turns out to be 1 segment of the unit.
- Connect all the balls in the same way.
- It turns out 13 segments of one color and 9 of another.
- The base is made from balls that are smaller.
- The fishing line is secured to the first segment by wrapping it between the balls several times.
- Another segment is attached to this segment, securing it with fishing line. This will connect all the segments for the base.
- A fishing line is tied in the center to secure the upper part of the structure.
- The vertical part of the number is made in the same way as the base.
Edible unit
One may be edible. For this, any baked cakes are used, from which a number is cut out. It is coated with cream or mastic on all sides. You can also form figures from mastic, which will then be used to decorate the unit on top. You can also bake gingerbread cookies in the form of a single piece, and cover it with sugar or chocolate glaze on top.
The number 1 for a one year old boy or girl can be made edible.
Animal figurines or fairy-tale characters made from mastic can be used for decoration.
By making the number 1 for their baby’s one-year anniversary with their own hands, parents will be able to create a special festive atmosphere. A room decorated in this way will please the hero of the occasion and will be remembered by all guests for a long time.
Edible cake
A fairly new way to congratulate a birthday person of any age is to serve him a birthday cake. You don’t have to know how to bake cakes, because you can use any of these ingredients as a basis:
- Cookies – homemade or purchased.
- Fruits, berries.
- Marshmallow, marshmallow.
- Waffles.
- Ready-made cakes will be very convenient to pick up.
- Mastic shapes - favorite characters or traditional figures.
Everything is limited only by the flight of your imagination. This popular table decoration will appeal not only to children, but also to adult men and women.
In addition to the above-mentioned decoration options, there are many more ways to demonstrate your skills, please your loved ones and make good money. The main thing is to take into account the hobbies and gender of the birthday person.
Video: DIY number 1 for one year old for a boy or girl
Find out how to make a three-dimensional one for a year old with your own hands in the video:
1 for a one-year-old child with your own hands, step-by-step implementation in the video:
How to make the number 1 for a year old from napkins (detailed master class with photos and videos)?
Your baby is already 1 year old and his first birthday should be memorable. Dress up the room for the holiday and for a photo shoot. An excellent solution would be to make an elegant item from napkins.
If you try, you can make one out of napkins with your own hands. For this you will need cardboard, glue, several packs of napkins of different colors, and masking tape.
We make a blank for our unit from cardboard. Its sizes can be different, depending on what effect you want to achieve.
You can, of course, make the figure flat and attach it to the wall; this will be suitable for a photo shoot.
But a volumetric figure looks much more impressive. But to do this, we need to give our unit volume by gluing it together with masking tape. As a result, you should end up with something like this.
Now let's start making flowers from napkins. You need to fold the napkin several times and fasten it in the middle with a stapler. Next, cut out a circle from a folded napkin. Each layer of our napkin flower needs to be trimmed a little along the edge, no more than 3 millimeters. Now each layer of the napkin needs to be lifted and slightly flattened, leaving the lowest layer flat for gluing.
Next you need to paint the layers so that you get a flower. Now all that remains is to glue the flowers onto our unit frame, all around the perimeter, except for the bottom of course. Now the number is ready. The piece turns out to be light, voluminous and very beautiful.
How to make number 1 for a one year old from napkins - step by step instructions
- cardboard (preferably a large box of household appliances);
- regular tape;
- paper napkins of the desired color;
- stapler;
- glue.
- First, draw the outline of the unit on cardboard and cut it out. On the second sheet of cardboard, circle the number and also cut it out.
First you need to create a strong frame for the number 1 from cardboard. You can make the number three-dimensional or flat.
In any version, the figure will look solemn.
Then, we make small flowers from napkins, which we will later glue onto the cardboard with the core.
DIY letter pillow
Nowadays you can no longer surprise anyone with an expensive toy or gift. The stores offer us a huge assortment of all kinds of goods for every taste and budget. But you always want more, you want to surprise and leave as a souvenir of yourself a thing in which you can feel the warmth of your hands and care. And only things made with one’s own hands can make a person smile as soon as he picks it up. Such a thing, for example, could be a personalized letter-pillow, which can be given as a gift for a baby’s first birthday or simply as a sign of attention.
To sew a personalized letter-pillow, we will need:
- cardboard;
- a simple pencil;
- scissors;
- ruler;
- fleece in two colors, in this case blue and white;
- needle and thread;
- padding polyester
First we need to make a stencil of the letter. We determine the size of the letter ourselves; in our case, the height of the letter is approximately 30 cm, the width is 25 cm. We take cardboard and use a pencil and a ruler to draw the letter on it.
If you have difficulties at this stage, you can print the letter on a printer using the Word program, the WordArt function. Cut out the letter and trace it on cardboard.
Instead of ordinary cardboard, you can use any available materials, the main thing is that they are thick enough, otherwise the stencil will slip on the fabric. In our case, for example, instead of cardboard, a regular shoe box lid was used.
Next, use scissors to cut out the letter along the contour. You can use nail scissors to cut out the hole in the letter A.
Now we apply the resulting stencil to the fabric and trace it along the contour. We make 2 parts.
Since the letter A is symmetrical, there is no need to ensure that it is positioned correctly on the fabric. But, if you are sewing, say, the letter P or C, then you need to place the stencil on the fabric in a mirror form. That is, you must have two parts that are “mirror” relative to each other.
After the letters have been outlined, we cut them out, but not along the contour, but 1 cm wider.
From white fleece, cut out a strip approximately 15-20 cm wide. The strip should be long enough to cover the side of the letter along the entire perimeter. The perimeter of the letter should not be measured in advance, since the initial result may differ from the final one. It is better to cut the strip longer and then cut off the excess.
Using the same printer, we cut out the letters of the name of the person for whom the pillow is intended. It is not necessary to cut out the internal holes of the letters; they can be made directly on the fabric.
We apply the letters to the fabric and trace along the outline. Remember about “mirror” letters.
Cut out all the letters along the contour. To cut out the holes in the letters, you can again use nail scissors.
Next, take a strip of fabric and one of the letter parts and, starting from a straight line, sew them to each other along the contour line with a “back needle” seam. In this case, the fabric should be positioned right sides to each other, but we sew the parts on the wrong side.
Sew a strip around the entire perimeter.
After this, we sew the ends of the strip to each other. If the fabric is longer, simply cut off the excess part.
Next, we again cut out a strip of white fleece the same width as the previous strip, but much shorter.
Place the fabric right sides together again and sew a strip on the wrong side around the entire circumference of the hole. The ends of the strip are also sewn on. You will get a “pipe” like this.
Now we sew the second part of the letter to the strip in the same way as the first, but carefully ensure that the parts do not twist. Therefore, first we find the corner of the letter (say, the lower right one on the leg of the letter), mark it on both parts and begin connecting the parts from this point. We also sew the second part along almost the entire perimeter, leaving a small hole at the end. The hole should be wide enough for your fist to fit comfortably into it.
Next, turn the letter right side out and thread the “pipe” of the letter’s hole through the hole of the second part.
Now we sew it to the edge of the hole of the second part using a “hidden” seam.
After this, you can evenly fill the letter with padding polyester through the hole left earlier.
Once this stage is completed, close the hole with a “hidden” seam.
Now we place the previously cut out letters of the child’s name on the side and sew them with a “back needle” seam.
The personalized letter pillow is ready.
The author of the master class is Elena Sharygina.
Children's birthday 1 year old: how to use numbers
Let everyone around you at the party just shout that today is your baby’s first birthday. And not only themed decorations, outfits, and treats will help with this. But also the number 1, which can be used in various ways:
- Be sure to add the words “I’m 1 year old” to your holiday garland. Let guests see from the threshold what the holiday is dedicated to.
- It's fun to make hanging garlands with numbers. Decorate each unit in accordance with the chosen theme.
- To decorate dishes, sweets, drinks, use toppers with a picture or in the form of a single.
- Lay out the unit on the wall with balls, bows, or make such a decoration out of paper.
- The photo zone must have a volumetric or flat number, which will later remind you of when the photographs were taken.
And most importantly, a large decorative number, which will practically become the central attribute of the name day. It can be miniature or huge, flat or voluminous.
This decor can be easily ordered or bought ready-made. But a do-it-yourself number for your 1st birthday will look much more interesting. Indeed, in this case, you can take into account the chosen theme, the baby’s outfit, and the size of the room.
And most importantly, preparing for any holiday brings relatives closer and gives it special significance.
So where to start?
The most important thing is desire. Now you are already in an almost festive mood, pleasant chores: preparing the table, choosing outfits and, of course, decorating the room, whatever it is: your apartment, a formal hall, a restaurant or even your country house - everything should correspond to the festive event and your mood. Undoubtedly, there will be a photographer at your holiday, and for a spectacular photo shoot you simply need beautiful decor, but if you have already spent a lot of money on purchasing products, invitations, gifts and outfits, do not despair, your hands and a little patience will save you.
You yourself can make an excellent accessory for your celebration, a large number from corrugated paper, and, believe me, it will look not only at a birthday party. The ideal option is to use such a number for a photo session for the birthday of your little miracle; of course, memorable photos with a large number will fit perfectly into the family portfolio.
For a more interesting idea, make a number every year in size according to the height of your baby; at one year old he can stand next to him, hugging the number; at two years old, for example, he can lie down next to it in beautiful festive embroidered pillows, but at three years old he can confidently raise the number above his head, supposedly demonstrating his progress in growth.
Such a number will perfectly highlight the years spent together, at your parents’ wedding anniversary, at the birthday party of the company in which you work; by designing such a number in a special way, you will make the alumni reunion evening and many other events unforgettable.
DIY birthday number 1 made from balloons
Kids just love balloons. Even very little ones are delighted with the decor made from balloons.
Moreover, making the number 1 for a birthday from balloons is quite simple.
We offer a master class on making the number 1 from multi-colored balls.
We will prepare all the necessary materials and tools. We will need blue balls up to 10 cm in diameter in the amount of 52 pieces. and 36 green ones of the same size. But it is better to buy balloons with a reserve in case something goes wrong.
To inflate such a number of balloons, it is better to use the simplest pump. This will speed up the process significantly. We will tie the blanks together using fishing line.
We begin the process of making a unit by preparing the basic elements. Each segment will consist of 4 balls.
To do this, fill the balloons with air using a hand pump. At the same time, we control the size of the balls. We tie each ball.
Take 2 balls of the same color and tie them together. Let's make another one like this. We connect the two finished pieces together by twisting them. We've got the basic segment of the craft.
We make the green segment in the same way.
In total, you need to make 9 green segments and 13 blue “fours”.
Let's start making the base of the unit from green balls. We fix the fishing line on the first segment, wrapping it several times between the balls. Now we press the next green segment to it and secure it with fishing line. In this way we connect all the green “fours” with each other.
We cut the fishing line and tie the remaining tail around the balls several times and hide it.
We have the base of the number 1.
We tie a fishing line to the center of the green clearing and begin to attach the blue segments. They will go vertical. In total we will attach 10 blue segments.
From the remaining three “fours” we make the nose of the ones. To do this, we will attach the segments to the side of the vertical part. When we connect all the segments, we pull the edge of the spout to the vertical part. We cut the fishing line, tie it and hide the edge between the balls.
Our unit is ready. If desired, you can decorate it with balls of a different color, from which you can easily make a butterfly, flowers, or ladybug.
In the same way, you can make numbers in a different design.
Sizes, patterns, decoration options for flat number 1 for birthday
Flat units look original and can be placed on the wall, curtains, simply resting against other decorative elements.
It is enough to decide on the size and height of the workpiece and make a template from paper.
We transfer the finished template onto a cardboard base and trace the outlines with a pencil. Cut out the number along the outline.
The cardboard blank for the festive unit is ready. You can decorate such a blank with anything you like, choosing the design and material to match the overall style of the holiday.
The easiest way to decorate a flat number is to use twine or multi-colored threads, corrugated or colored paper, bright fabric or floral film, flowers or napkins.
These materials are used to wrap or paste over the base.
To give the decoration additional volume, the base is decorated with voluminous flowers, pompoms, and bows.
Number made from colored paper for origami, decor method 1
It’s even easier to make a number from colored origami paper, and the result will be no worse than in other options.
We start in the same way, cut out the frame, glue it, cover it with paper for beauty, of course. Next, we cut rectangles from colored paper of different colors, approximately 13x8 cm in size. We make cuts into strips, not wide, about 1-1.5 cm above the middle. It turns out to be such a fringe.
We twist each strip a little with scissors (you can do it one at a time to add fluffiness). And we begin gluing by placing one under the other. Your number, literally before your eyes, becomes like a hedgehog.
For a brighter look, you can randomly make inserts from artificial fruits, strawberries, cherries, butterflies for tulle also look interesting, in general, everything that glitters and shimmers, candies, beads, foil in the shape of flowers.
Volumetric figure 1 from cardboard for birthday
But a volumetric figure will look much more interesting. Her birthday boy will be able to rearrange and play with her. Such a voluminous unit will fit perfectly into a photo zone and into the design of a room or garden area.
To make it, you can use thick foam. But if such material is not at hand, the blank can be easily made from ordinary cardboard.
Even if you don't have large boxes, you can glue the base together from several parts. First, we make two templates for the unit itself.
We cut out the side parts and the base of the number to size.
We connect the blanks together with tape.
The result should be a three-dimensional cardboard figure like this.
Don't be upset that she isn't too pretty.
All flaws and irregularities will be securely hidden under decorative elements. You can decorate such a base with paper umbrellas and flowers, fringe and photographs, felt and thread.
How to decorate one for a birthday
We offer several original options for decorating the number 1 with your own hands from scrap materials. Save these master classes for yourself - they will definitely come in handy for decorating three-dimensional figures for other children's parties.
Number 1 in eco-style made of twine, threads
A very simple option for decorating a flat piece. We will need regular twine and glue.
Gradually apply glue to the cardboard. Wrap the treated area with twine. You can make neat turns, or you can slightly change the angle of inclination. When you have wrapped the glued area, apply glue higher and continue winding the twine.
When you have wrapped the entire piece, leave the number to dry. Almost one is ready. But if desired, the twine can be painted with acrylic paints or decorative elements can be added.
But you can initially use not twine, but bright threads with which we will wrap the cardboard blank.
Number 1 from napkins for a boy's birthday
Make the fluffiest birthday number for your little one.
This will require colorful napkins, a lot of napkins and patience. But the result is worth it.
This decor will be much cheaper than ready-made figures.
We buy several packages of blue or blue plain napkins.
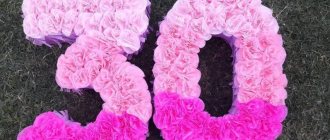
If you want to dilute the blue background with white flowers, purchase napkins of the appropriate color. The numbers with a smooth color transition look very cool. In this case, you will need napkins in blue, light blue, sky and white.
To make napkin flowers, it is better to take single-layer napkins. Without unfolding, fold the napkin twice. It is not necessary to cut the squares; in the future, all folds will be cut off. We fasten the workpiece in the middle with a stapler. You can use regular wire to secure the base of the flower.
Now we cut the square to the size of the flower to make an even circle.
We carefully collect the first layer of the napkin upward, forming flower petals. We perform this operation with each subsequent layer. Once you have lifted all the layers, spread out all the petals.
If you want to make a more magnificent flower, take two napkins. You can also cut the round blank into several petals without cutting to the base.
We decorate a cardboard blank with ready-made flowers. It is better to do this with glue in a gun.
After pasting with napkin flowers, you get a beautiful lush number 1.
Number 1 for a girl's birthday made of corrugated paper
Corrugated paper roses look great. A number decorated with such flowers will become a chic decoration for the anniversary. You can get creative, experiment with the color and arrangement of multi-colored flowers, or just make a single-color unit.
You will need quite a lot of corrugated paper, and also time to make a lot of blank flowers.
Unfold the paper and cut strips from it. The folds on the workpiece should be located across. The width of such a blank will be 3.5 cm. But decide on the length yourself. It can be 20 or 50 cm. The longer the strip, the more magnificent the rose will be.
We slightly stretch one side of the strip and bend its edge. By stretching the folds you should get beautiful waves.
We bend the edge and form a curl.
We begin to collect the flower itself, for which, holding the edge, we begin to twist a strip of paper around the base.
When the entire strip is folded, the bottom of the flower must be secured with an elastic band or thread.
The first rose is ready. But you need to make another 50, 100, 300 flowers.
We cover the cardboard base of the number with paper.
This will help hide possible gaps that may occur during gluing.
Glue the finished flowers to the base using PVA glue or a hot glue gun.
The result is a beautiful decorative piece that will invariably please the birthday girl.
Other uses for corrugated paper
Don't have the time or desire to tinker with corrugated paper roses? Take advantage of simpler ways to decorate a unit using it.
It is enough to cut multi-colored corrugated paper into squares.
To do this, we fold the blank strips several times and cut them along the resulting folds.
We will get a lot of corrugated squares.
Lubricate the cardboard base with glue. Take a pencil and wrap it in corrugated paper so that the rod is in the center.
All that remains is to dip the bottom of the flower in glue and attach it to the base, straighten the petal edges.
Gradually we cover all the walls of the cardboard blank. Try to ensure that the petals cover the entire surface of the number.
But there is a much simpler way.
We cut long strips of corrugated paper of different colors. We make cuts along the edge of each strip to create a fringe.
We begin to paste over the cardboard unit from below. Glue the first strip of fringe by applying glue to the entire part of the strip.
Stepping back a little, glue the next strip. Make sure that the next fringe overlaps an entire section of the previous one.
We continue to paste over the entire surface of the unit, changing the color of the stripes.
Birthday number 1 made from pompoms
If you have a lot of multi-colored woolen threads at home, you can use them to decorate the number 1. Only this time we will not wrap a cardboard blank, but make pompoms from the threads.
We will need two rings that must be exactly the same size. They can be cut out of thick cardboard.
Put these rings together. We gradually wrap the rings with thread. You can take a single-color thread or threads of different colors.
When the entire ring is covered with threads, cut the threads along the outer edge of the circle. At this stage you need to be especially careful so that the workpiece does not crumble.
We tie all the threads with additional thread, slightly moving the rings apart. Remove the cardboard rings and shake the resulting pompom thoroughly.
We make enough pom-poms from threads to cover the entire unit. In this way you can decorate both flat and volumetric figures.
What kind of jewelry can be made digitally?
Before you start working with a figure, you need to understand what elements will be used to decorate the sides of this three-dimensional figure. There are many variations of what you can use to design the composition in question. The most common option are fluffy roses. They are quite easy to make using napkins.
Have to take:
- napkins;
- round templates;
- stapler and scissors.
The work is performed in a certain sequence. Initially, you need to fold several napkins so that a square is formed. If you take more material, the flower will be more magnificent. A circle is applied to this stack, and all the circles are cut out at once. The middle is connected by using a stapler. Then each layer must be raised in such a way that a lush flower is formed.
According to the scheme under consideration, it is also possible to make other varieties of flowers. They differ mainly in that there is no need to cut in a semicircle. Various elements for numbers can be performed not only with napkins, but also with paper. You can fold the napkin four times, draw a semicircle at its base and trim along the edges. You need to do several layers this way. Roses can be made using corrugated paper. This option requires a lot of money, but the result will look much more significant.
Speaking about how many napkins and flowers you will need to spend, we can say that it depends on the size of the figure that you plan to create. It is recommended to prepare less than three packs of napkins, or even all five. As a rule, it takes about 200 or 500 colors to create one number. The indicated quantity depends on the amount of splendor planned for the decor, the size of the number and the level of density relative to the rows.
You need to fold the paper in half and this creates the impression of volume. You can also use fringe that has one layer. In this case, fewer napkins or paper are wasted in rows. General principles for performing the work under consideration have been established. This includes cutting out a strip of paper and cutting from the edge. The part that is not cut out is glued to the number. The layers are attached so that the previous one covers the uncut part.
You can also use other methods. Trimming, for example. It is envisaged that square-shaped sheets of paper are attached to the base. This is more often used for foam. Some people use the quilling technique.
