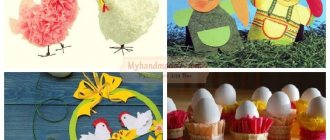
Gifts for mom are a hot topic for creative activities with children all year round. The eighth of March, mothers' day in November, New Year, February 14, name day or professional holiday - there is always a reason to please a loved one. The most expensive gift is the one the child made with his own hands. Children love making souvenirs for their beloved mother; they are proud of themselves, seeing the joy and delight on her face.
In this article you will find a variety of paper crafts for mom - from simple cards that 3-4 year olds can handle, to complex voluminous flowers.
Flower garland
A decorated kitchen or room that the birthday girl discovers early in the morning will be a pleasant surprise - so a paper craft for her mother’s birthday will become an attribute of the holiday and an original decor for the room for several months. Later, you can decorate the group or class where the child is studying with a garland.
Multi-colored daisies connected into a garland are easy and quick to make, and you can hang them on curtains, a wall or a chandelier.
For this:
- Fold multi-colored A4 sheets like an accordion.
- Tie each accordion in the center with regular white thread.
- Trim the edges until they are rounded.
- Straighten the blanks and glue the ends.
- Glue a round core of a different color to the center of the daisy.
- Thread all the flowers onto a long thread.
Bouquet in the palm
An original idea for a birthday gift for mom is a bouquet of flowers clutched in a child’s hand. The kid will definitely love the idea of making his own pen and putting flowers in it, and the process itself will not take much time and effort.
- First make a palm. To do this, the child needs to put his pen on a light sheet of paper, circle it and cut it out. The daughter can decorate her wrist with a bracelet, and draw and “paint” her nails on her fingers.
- Create a flower bouquet. Cut out petals, buds, and stems of different sizes using templates from thick multi-colored sheets, assemble them into a bouquet, gluing the finished flowers together at one point.
- Glue the palm blank to the base of the card, leaving the fingers free.
- Place the bouquet in your palm, wrap your fingers around the stems and glue them to the base of the card.
It turns out to be a very unusual gift. In the same way, you can “put” a basket of flowers into the handle.
A gift that a school-age child can give
Since at school age children already have enough skills and abilities, crafts can be very diverse. With his own hands a child can do:
- Jewelry (beads, earrings, bracelets, brooches);
- Vases;
- Handbag;
- Various decorative items.
Jewelry for mom
There is no such thing as too much jewelry, so you can give your mother the following as a gift:
- Bracelet made of beads, threads or elastic bands;
- Original bracelets made of unusual materials;
- Pendants, beads, earrings and rings made of polymer clay.
Braided bracelets
- Bracelet made of threads and beads
Ordinary inexpensive jewelry can be easily and simply turned into a unique product - you just need to wrap beads around an ordinary metal or plastic bracelet using colored yarn.
Simple bracelet made of threads and beads
By weaving large beads into a braid of cords, you can make a wonderful bracelet even without beading skills.
For such a bracelet you need floss threads, a leather lace, a large interesting button and scissors. At the end of the lace a loop is made for a button, the lace is braided with threads, and a button is attached to the end opposite the loop.
Bracelets made of unusual materials
Crafts made from wooden sticks are known to many, but not everyone knows that this material is suitable for making an original bracelet. For the bracelet you will need:
- Wooden sticks;
- A cup with a diameter matching the size of the hand;
- Acrylic paints.
The sticks should sit in water for about a day to become flexible (or you can boil them for 15 minutes - then they will acquire a dark shade).
Then carefully place them in the cup.
When the sticks are completely dry, take them out and paint them.
The bracelet can be made from a plastic bottle and fabric. These crafts do not require special skills - a ring of any thickness is cut out of a bottle and wrapped with yarn, covered with lace or fabric.
Polymer clay jewelry
To make such jewelry you need:
- Polymer clay;
- Sharp stationery knife;
- A special rolling pin or metal tube;
- Toothpicks;
- Stacks;
- Accessories (bases for rings, clasps, etc.).
The plastic is softened, cut and rolled out using tools. We sculpt the details of the product (beads in which we make holes, etc.). It is advisable to bake flat-shaped beads on a ceramic tile, while round beads should be strung on a toothpick and stuck into foil.
Tip: When baking plastic for the first time, practice on a small part. You can cook plastic made in Poland - other types are better baked.
From this clay you can create other crafts as a gift:
- Candlesticks;
- Keyrings;
- Photo frame;
- Figurines and funny figures.
Bouquet in a vase or mug
The floral theme is endless. Here are two more options for making beautiful paper bouquets.
Clover, tulips or forget-me-nots in a mug can be made by a 3-4 year old child with a little help from an adult.
- Make a template for a mug with a handle.
- Fold a colored A4 sheet in half (you can take a smaller format), trace the template so that one edge of the mug coincides with the fold, cut it out, leaving the handle on only one side.
- Prepare the design of the front of the cup. To do this, cut out patterns on a white template using nail scissors. Glue the white part to the colored part.
- Make flowers from thick colored sheets,
- All that remains is to put them in a mug. Please note: you need to glue the bouquet to the inside of the cup. To make the structure stable, make the stems thick and short.
This is the kind of greeting card your child can make himself. The work is easy and interesting, and the entire manufacturing process is shown step by step in the pictures below.
You can also make a vase from disposable plates with grooved edges, painted with acrylic or gouache paints.
- One of the plates is cut in half and glued to the second so that a convex container is obtained.
- Then you need to build flowers. Paint the wooden skewers green. Collect flowers from three to five petals. Each petal is a red or yellow strip glued together at the edges. The resulting loops are glued together: a skewer is attached to them on one side, and a core on the other.
- The child can place the finished flowers in a vase and decorate the composition with decorative floral tape, beads, and corrugated sheets.
Paper flowers for mom
The most common gift for mothers is flowers.
Therefore, the very first option we will consider is how to give your mother a gift of paper flowers.
For the process of creating flowers you need to prepare: scissors, glue, thin wire, a wooden stick, colored corrugated paper in red and green.
Cut out the petals for the flower from red paper. Inside the flower we will have a delicious favorite candy.- Attach it to a wooden stick by the edges of the candy wrapper.
- We secure the cut out petals with wire and glue them around the candy.
- For a more realistic look of the flower, it is better to turn the edges of the petals a little outward.
- Let's make a stem out of green paper; to do this, cut out a long strip of green paper and wrap it around a wooden stick.
- This will create a green stem.
And so we got a beautiful flower with a sweet gift inside.
If you have time and desire, you can make a whole bouquet of paper flowers. Such a bouquet can last a very long time and bring joy.
You can make a vase for these flowers. Flowers will look organic in it.
Daffodils
Narcissus is a flower born in spring. A gentle, beautiful card with daffodils will be a wonderful gift for the first day of spring or March 8th.
- White petals, stems and green leaves are cut from ordinary multi-colored leaves, and daffodil cores are made from cells from an egg container.
- Each cell needs to be cut out separately and covered with yellow paint - your son or daughter will cope with this task without the help of adults.
- The dried cores are glued to the main part of the card - the gift is ready!
Volumetric tulips
This is a real bouquet that will retain its freshness and beauty for a long time.
For the bouquet you will need wire, glue, colorful sheets and a decorative vase or other small container.
- Cut out blanks for flowers. Each tulip consists of two blanks: a small four-leaf one and a large six-leaf one. In addition, you will need to cut out the core and two long green leaves for each tulip.
- Pass the wire through the first piece and bend it, glue the core on top.
- Fold and glue the petals to form a bud.
- Pass the large piece through the bottom in the same way as the small one, and form a bud in the same way.
- Wrap the wire - the stem of the tulip - with green corrugation or a napkin, coated with glue.
- Glue the petals to the stem, first giving them a bend.
- Make each new flower in the same way. There can be three, five or seven tulips - it depends on what kind of container you have prepared for them.
- Place the finished flowers in a vessel and present it to the birthday girl.
Postcard with fluffy daisy
This unusual card looks very elegant and festive. Manufacturing requires patience, attentiveness and the ability to work hard, so it is more suitable for children 5-7 years old. To make a postcard you will need the following materials and accessories:
- Scissors.
- PVA glue.
- A simple pencil.
- Colored sheets of cardboard and paper.
- White sheets.
- Wallpaper with a bright floral pattern or a piece of decorative paper.
Now you can begin the process itself.
- Make 34-36 identical white daisy petals using the template.
- Wrap each petal slightly in the center, placing a pencil on the surface so that the petals bend. You can use scissors for this purpose, the main thing is not to tear the leaves.
- Take two cores and glue half of the petals to each.
- Glue two half daisies and attach another one on top - a yellow core.
- Fold the yellow cardstock down the center for the card.
- Make a flower template, attach it to the front of the card, trace and carefully cut out a “daisy window” in the center, or moving it a little down and to the left.
- On the inside of the card, which is located under the flower window, glue a blank sheet with an ornament.
- Glue a daisy in the corner at the top of the card. You can attach thin green curls nearby (the stripes can be curled with scissors), and plant a small ladybug on the chamomile petals.
Craft materials
Almost all available materials can be used as materials for crafts. The most popular materials include:
- Paper (cardboard, corrugated, colored, etc.)
- Fabrics
- Plywood
- Plastic dishes
- Natural materials (leaves, cones, etc.)
- Threads and pompoms
- Plasticine, clay, dough
You need to make crafts for mom with your own hands according to the instructions, this makes it much easier to work and avoid mistakes.
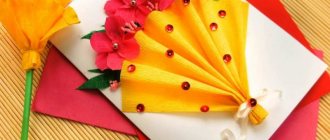
Puppet experiment
With this creative craft you can congratulate your fashionista mom. The postcard turns out to be original and targeted, because the doll is made to look like the birthday girl.
- Prepare thick but thin white sheets of paper, magazine clippings, and scissors (or a special cutter for layouts).
- First prepare the base. Fold a white piece of paper in half and draw half the silhouette of a lady in a dress from the center. It is desirable that the dress and hairstyle be lush and voluminous. Don't forget to label your shoes and maybe your purse. Cut out the silhouette.
Now you can experiment with the workpiece. As a rule, dad gladly joins in choosing an image for the birthday girl, and the creative process turns into an exciting game.
When the outfit is ready, secure it to the back of the base and cover the inside with a thick sheet of white, gray or any other color.
Delicious and sweet birthday bouquets for mom
Continuing the theme of bouquets, we recommend making a composition from either fruits or sweets. We will use wooden skewers as legs, on the tip of which we will put treats - this will be a great gift for mom for her birthday.
Perfect for a fruit bouquet:
- Half peeled pomegranate;
- Oranges, cut in half;
- Grapes;
- Kiwi halves;
- Physalis;
- Strawberry.
For a composition of sweets, we recommend taking:
- Marshmallow;
- Marshmallow;
- Halves of nougat bars (Snickers or step);
- Dried fruits (dates, dried apricots, prunes);
- Cone sweets (eg truffles).
Make the center of the bouquet, secure the skewers with ribbon or an elastic band, then continue to make the arrangement, securing the final version with an elastic band or tape. It is best to pack such a gift in craft paper.
Jewelry box
You can put a few candies or a small present in this box, or you can give it as an independent gift.
For production you will need:
- brightly colored cardboard;
- pencil with ruler;
- glue;
- breadboard knife.
- To make a heart you will need a model. You can transfer it to the back of the cardboard yourself or print out the finished diagram.
- After the diagram is transferred to the working material, it must be carefully cut out and bent along all the sides and lines.
- As the heart is assembled, each notch is glued, the parts of the box are compressed - this is how the heart is gradually formed.
At the end, the box can be decorated with beads, large beads, textile bows, flowers or butterflies.
Heart bookmark in an envelope
This is a very cute baby gift for mommy, including packaging and a little surprise inside.
First, make a bookmark for the book. This is done very simply.
- Take bright red (blue, yellow, purple) paper and cut out two identical hearts from it, leaving small allowances on the sides so that the hearts can be comfortably wrapped around the book pages. Please note that red sheets should not be painted or washed off.
- Place the hearts together, you can carefully glue them, but you need to make sure that there are no bulges or traces left from the glue. Fold the allowances well. The result is an original bookmark. Now you need to package it beautifully.
- Make a small envelope for a surprise bookmark. The envelope can be made from decorative thick paper or cardboard with a pattern. You will also need a small thin ribbon of a bright color.
- Cut out four circles with a diameter of 8-10 cm and fold each circle in half.
- Form the circles into a square. To do this, they need to be folded overlapping and glued at the places where they overlap.
All that remains is to put the heart inside, close the envelope, folding the semicircles together, and tie a beautiful ribbon.
Gifts that children over 4 years old can give
At the age of four, children usually already know how to handle plasticine, scissors and glue, so beautifully designed various applications and plasticine crafts are a good gift option for mom (these are the gifts most often given in kindergartens for March 8th).
The child can do:
- Paper applique;
- Thread applique;
- Appliqué made of fabric and buttons;
- A vase, photo frame or panel made of large ball plasticine;
- Paper flowers;
- A vase from an ordinary jar.
The child can handle the job quite well on his own, dad just needs to be present and help if necessary - the parts are not always glued in the right order, etc.
Paper applications
To make an applique, choose medium-sized scissors for your child with a blunt end and rubber handles - such scissors are much more convenient to work with. Colored paper must be of good quality.
If your child has not yet learned how to cut out complex shapes, it is advisable to choose a flower applique.
For this applique, cut out the middle circle and paste it in the center. Then the petals are gradually cut out and glued (they do not have to be in the form of bent strips, petals of any shape can be cut out). The rest of the flowers are cut out and glued in the same way, and then the stems and leaves (they can be drawn with a pencil or felt-tip pen).
If your child is excellent at carving, you can make an applique picture for your mother on any theme.
Since all women love flowers, you can invite your child to make one of the options shown in the photo below.
You can make an applique out of paper even with a child who does not know how to cut - a child can simply tear colored paper into pieces, but you will need to glue it.
Appliques made from wool threads
A rather original gift is an applique made from woolen threads of various lengths. The simplest option is a mother’s portrait. For such an applique, two pieces of fabric (for the face and for the dress), threads to match the hair color, glue and an eye are enough, which are glued to soft toys.
You can draw the mouth with a felt-tip pen, and also decorate the portrait with two earring rings.
A variety of furry animals made using this technique look great. For such an applique, an outline is drawn on thick paper (dad needs to try hard here), threads of the desired colors are finely cut, and then the template is generously covered with glue. Now you just need to sprinkle a layer of glue with the cut threads and slightly press the threads in the middle of the outline with your finger. The work should dry well, after which the excess threads are simply shaken off the sheet.
The threads can not be cut into “crumbs”, but glued in a circle.
Applique made of fabric and buttons
For this applique you will need small pieces of fabric, glue, buttons and scissors. You can also use a variety of decorative elements. If the child has chosen a specific picture, and not just a composition, he needs help making a pattern - drawing the outlines on the fabric. If the baby is not yet comfortable with a needle and thread, dad, grandmother or older children need to help finish the edges of the fabric with a seam over the edge. If this is not possible, the edges will need to be well treated with glue so that they do not crumble. The child can cut out and paste the parts himself, and the location of the buttons and decor should be marked with a felt-tip pen so that the child places the parts correctly on the fabric.
Those children who already know how to sew buttons can sew them to the fabric rather than gluing them.
Vases, photo frames or panels made of large ball plasticine
For such work, you need to purchase coarse-grained glycerin-based plasticine (hardening and distinguished by delicate pastel shades). It is harmless and convenient for babies.
To make a vase, take an ordinary cardboard cup, remove the plasticine from the jar and knead it well - the gel should be evenly distributed throughout the entire volume. Gradually apply the grains of plasticine to the glass and leave for a day - during this time the plasticine should harden.
We decorate a photo frame in the same way, into which you can insert a family photo or a photo of a child.
You can make any figure from this plasticine. Such crafts perfectly enliven the interior.
The panel will also look good, but for its manufacture it is better to choose fine-grained plasticine.
Tip: You should not use glycerin-based plasticine to decorate glass and plastic surfaces - the balls will gradually lag behind the surface. The work must be completed before the glycerin dries - dried parts do not stick well to each other.
Paper flowers
All mothers are partial to flowers and all children know that a bouquet is a traditional gift for mother for any holiday. The only drawback of such a gift is its fragility. But you can give your mother both a traditional and original gift - a bouquet of paper flowers. Such crafts can be made:
Volumetric (flowers made of corrugated paper look good);
- Using quilling technique;
- Using origami technique.

