Oh, and Easter gave us some work to do! And we made crafts, baked Easter cakes and painted eggs, but where do we put everything? My dears, an Easter basket will help you out. It will collect all the Easter symbols in one place, and can also act as a present for relatives and friends.
We are used to giving treats by taking them out of a package. And it's not always convenient. Therefore, think that you can make a separate box for each family and collect treats in it in advance. And then give it as a gift, I think that your relatives and friends will appreciate such a gesture of attention.
And you can make a stand from whatever you have on hand! It can be textile, paper and even plastic. Intrigued? Then let's get creative.
What are Easter egg baskets made of?
A distinctive feature of Easter baskets is their small size, sufficient to put several colored eggs and Easter cakes inside.
Such crafts can be made from traditional wicker, willow twigs or carved from wood, but in urban environments, of course, other materials are relevant. Let's look at the most popular of them:
- Paper. The technique of wicker weaving in modern conditions has been modified into weaving from paper strands. First, thick tubes of newspaper or tissue paper are rolled up, and then a basket for Easter eggs is made with your own hands. But thick paper can also be used to form small decorative baskets. Its disadvantage in this case can be considered the fragility of the craft. Such a basket cannot be folded, which means you will need to allocate a separate place for storage or create a new one next year.
- Cardboard. An excellent material for creating a rigid base, which is decorated with colored paper, fabric, lace, but in this case, you will need to allocate a separate shelf to store the basket; it will not be possible to fold it.
- Yarn. A crocheted basket for eggs, if you use dense knitting patterns, will not require additional frames or rigid bases. Both a box and a thick handle are woven from the yarn, and the finished product is not afraid of water, and in most cases, packaging during long-term storage.
- Textile. Used as a decorative material for a rigid monolithic or frame base. That is, first a box is formed from cardboard or plastic or wire, and only then it is covered with fabric. The exception is small decorative baskets for one egg; they can be made from thick felt without using a frame.
To decorate the finished base, you may also need ribbons, trims, lace, sequins, seed beads, beads, felt and foamiran, and fabric flowers. Paper baskets are also decorated with three-dimensional flowers made using the origami technique. In general, the decoration and materials for it can be anything.
Also, we should not forget about the instrumental base for creativity. Depending on the technique in which you decide to make a basket for Easter eggs, you may need:
- a needle and thread in the color of the fabric or the main weave - for fastening parts or sewing on decorative elements;
- hooks, knitting needles, row counters, magnifying glasses for patterns - an experienced craftswoman will only need yarn and a tool to make a basket of eggs for Easter with a crochet hook, but for beginners it is better to use the maximum number of elements that simplify the work;
- PVA glue and gun glue;
- pliers, round nose pliers and wire cutters;
- scissors or a hard knife.
Lately, it has become increasingly difficult to surprise someone with a craft using only one technique, so many craftswomen combine various technologies, for example, the bottom of the basket is glued using the cardboard technique, and the walls are woven from yarn.
Note! A crocheted basket for Easter eggs, like a wicker or cardboard one, looks very beautiful, but is not always practical, since with a large diameter it hides the eggshells behind its walls. To ensure that each egg is placed in its place in the basket, it is recommended to install paper or plastic containers-stands for transporting eggs on the bottom
This is especially true if you have Easter eggs and want to show the Easter egg in all its glory without damaging it when moving.
Before preparing materials and tools for creativity, you need to decide on the basic characteristics of the craft. Answer a few questions:
- What is a basket for - for transporting Easter cakes and eggs, for table decoration, for home decoration?
- How durable should the craft be - for one holiday or for long-term use?
- How much time do you have to sew or knit an Easter egg basket?
After this, it will become clear what size and how durable the craft should be, and whether you have enough time to implement the idea.
Crochet basket: diagram and description
Knitted baskets always create a very homely and cozy mood. They can be used not only as a gift, but also as decoration.
I suggest watching a video that describes the entire knitting process step by step.
I also love the idea of crocheting with jersey fabric. This fabric yarn is easy to make; many people became familiar with it in childhood, when they saw their grandmother knitting rugs for the hallway.
The fabric is taken and cut along its entire length into strips of even width. The edges of the strips are tied, but to make it look neater, it is stitched. And the knitting process begins according to the chosen pattern. Most often, only single crochet is used.
And now ready-made knitted yarn is on sale! You need to choose a large hook for it. So he can grab the thread.
And the product also looks very beautiful when it contains two colors of yarn.
You can also knit a stand for each testicle.
And for the craftswomen, I found this picture. I think it will deprive many needlewomen of sleep. But, if you look closely, you can see that it consists of two circles of different diameters. And you can repeat it not only by crocheting, but also using any fabric.
DIY Easter Basket Ideas
Despite the beauty of modern Easter baskets, you want to make this festive element yourself in order to put your thoughts and aspirations into it. If you want to make an Easter basket, you don’t have to master the skill of weaving from wicker, because by connecting your imagination to this process, you will get an excellent basket from other materials.
To make an original and beautiful Easter basket with your own hands, find a suitable base (flower pot, small decorative bucket, dishes, etc.) and cover its surface with fabric, and then attach a strong handle from wire, strands or other suitable materials. In addition, decorate your basket with artificial or fresh flowers, tree leaves, bows, ruffles, etc.
DIY Easter baskets photo
How to make an Easter basket
Easter baskets made from dishes
If you are proficient in the quilling technique, decorate the product with suitable applique and paper decor.
Easter basket using quilling technique
By the way, you can make an Easter basket entirely out of paper. Of course, paper products will not have the necessary strength, but such a basket will be an excellent basis for Easter gifts or festive Easter decor.
First, you should draw the base of the future basket in the form of a square on thick cardboard. Next, add rectangles to all sides of the square, slightly larger in size than the base square. When cutting out the future workpiece, we leave small allowances on two opposite rectangles, which will allow us to glue our future basket. We bend and glue the cut-out blank, after which we make a handle for the basket, cutting it out of the same cardboard. Having glued the handle to the basket, we begin to decorate our product. In this process, you can show all your imagination using any suitable items: ribbons, bows, appliqué, buttons, rhinestones, etc.
Small baskets for Easter eggs made of paper
Simple DIY Easter basket made from paper
DIY cardboard Easter basket
Interesting baskets are also made from ordinary soft cardboard, which is often used to make bags in supermarkets. Cut the paper into several long strips and fold them in half for extra strength. Lay out four strips in length and four in width, then weave them overlapping each other, creating a bottom for the future basket. After this, fold the remaining edges of the strips and continue to fold them in a checkerboard pattern to create the sides of the product. To prevent the product from falling apart, secure the paper inside with glue or transparent tape.
Easter paper basket
Easter paper basket
Paper baskets for Easter eggs
You can also make a simple basket from a plastic plate. To do this, you need to carefully trim its edges around the entire circumference and fasten them together using a stapler, and then attach a handle to the product.
Easter basket made from a plastic plate
Another interesting base for making an Easter basket is a cardboard egg tray. Just paint it in a suitable color and decorate it with the materials you like - ruffles, fabric, flowers, etc. For convenience, the inside of the tray can be covered with fabric, and the handle can be conveniently made from twine or threads twisted and soaked in glue.
DIY Easter baskets photo
If you like to make crafts from felt, make an original basket in the shape of a spring meadow. To do this, take thick sheets of felt and glue them together in the form of a rectangular box, sealing the bottom with a cardboard or plastic base. This basket can be beautifully decorated to your liking.
DIY felt Easter basket
Also, many housewives make Easter baskets from dough - it turns out original and at the same time edible.
Easter basket made from dough
No matter what material you use to make your Easter basket, it is important that you try to get rid of bad thoughts and be able to stay positive while making it. Indeed, in this case, the Easter basket from an ordinary decoration, decor or container for carrying food will turn into a strong amulet
Popular articles Beaded bracelet for any outfit
Glow in the dark wallpaper
4 ways to “domesticate” blinds – modern types of blinds
Curtains for the balcony: choosing the most suitable and convenient design method
An original wall clock is a beautiful accessory with deep meaning.
Easter tree - an ancient symbol of Bright Resurrection and original decor
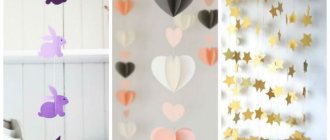
Basket with hares
Craftswomen who love to sew will not be able to pass up an original master class on making Easter crafts. You can make your own Easter basket from fabric. This product will become a holiday decoration.
Materials:
- paints;
- threads;
- padding polyester;
- sample;
- paper;
- pencil;
- scissors;
- blush;
- brush;
- cardboard;
- glue;
- fabric of different shades;
- tapes.
Execution sequence:
- We print the template on paper.
- We transfer the diagram to the fabric, cut out the necessary parts: 2 for the top 10x73 cm, 2 for the bottom 7x73 cm, 2 for the handle 5x55 cm.
- We cut out a circle from cardboard with a diameter of 19 cm. This will be the bottom of the craft. We apply the paper template to the fabric, trace it along the contour, cut it out with an allowance of about 2.5 cm. Place the circle on another fabric, cut out the blank with an allowance of about 1 cm.
- We glue the padding polyester to the cardboard template on all sides, and put the blank under the press. As soon as the element dries, cut off the excess padding polyester.
- We sew the lower and upper parts, leaving an allowance of approximately 0.5 cm. Carefully smooth out the seam.
- We continue to work on the Easter basket with hares. The master class will tell you how to make a craft with your own hands. We trace the hares according to the template, we get 10 animals. In the first and last character we draw the sides, in the rest only the heads.
- We make lines along the marked lines. We cut out the workpiece with curly scissors. Between the ears and in the places where the ears meet the head, we make small cuts.
- Iron the product. We make vertical lines between the hares. We draw eyes and nose with paints. We make a knot on the ears with a regular thread, and draw on the cheeks with blush.
- We fill the craft with synthetic padding, put a line at the bottom, and sew the edges. We hide the top seam under a bright ribbon.
- We connect the animals in a circle. We do this using a hidden seam.
- Let's start making the bottom. We put basting stitches on the large circle, make an allowance on the small part and fix it.
- We place a piece of cardboard and padding polyester on a large blank, and tighten the thread.
- Place a smaller circle on top and sew it on with hidden stitches.
- Sew the hares to the bottom.
- Let's make a handle for the basket. We take the strips, fold them lengthwise, make a line at a distance of 0.5 cm from the edge. In the same way we form 2 blanks.
- We turn the product inside out and fill it with padding polyester. We braid the elements and add them to the composition.
- We make bows from ribbon and attach them to the arms and ears of the hares.
The original craft is ready. It will appeal not only to adults, but also to children. A bright and colorful product will become a holiday decoration.
Also read: What can be made from old tights - the best ideas
Advice!
To make the craft original, you should prepare fabric of different shades for the work. It is advisable to choose a material of bright color.
Paper baskets (MK)
Making a basket is a very exciting process, especially considering that various materials are used for this. To create a paper basket, use old newspapers or magazines. Such a gift does not require large expenses, since such materials are available in almost any home. Of course, here it is worth making sure that the paper is thick. This will greatly simplify the task and allow you to create an ideal storage for Easter eggs.
Making paper baskets for Easter according to a template will be done using a certain technology, the observance of which will allow you to achieve the desired result - to create the perfect present for your family. So, the work is carried out in the established sequence:
1. Cut out a square from paper. Its side must be a multiple of three. This can be a square, the side of which is 45 or 30 cm. The size of the workpiece will directly affect the size of the basket itself. So, in the case of a square whose side is 45 cm, you will get a basket 15 cm long. You must first decide what size you want the future basket to be.
2. The workpiece is marked into 9 squares, which will have the same dimensions. In this case, you need to cut out the four corner parts. The central square is used as the bottom for the future basket. It remains unchanged. The cut out squares are cut into strips of equal width. But it is worth considering the main feature that the cut should not reach the edge. It is important to use a utility knife.
Making blanks
3. Take a leaf and cut it into strips of the same width. In the future, these strips will be used to weave the perimeter of the basket. The edges need to be secured with glue, which will give the frame rigidity.
Weaving process
4. All that remains is to attach the handle to the basket.
Ready basket
Decoration and embellishment of a paper basket is carried out individually to the taste of the hostess. Grass is imitated using green corrugated paper. It is cut into thin strips, which are placed on the bottom of the basket.
On video: Easter basket made from newspaper tubes
Basket of old glossy magazines
Surely everyone has unnecessary glossy magazines at home. So put them to work and it’s beautiful, useful, and a mini cleaning.
Necessary materials:
- Multi-colored glossy magazine – 1 piece;
- Stationery knife – 1 piece;
- PVA glue – 1 piece.
Let's get started:
Using a stationery knife, cut strips two centimeters wide from magazine sheets. And divide another sheet in half and make cuts 2 centimeters wide inside each half, but not all the way.
And now we insert each strip into the sheet alternating cuts. Fill the sheets completely, gluing the ends and attach the handle.
Add decorations of your choice and the basket is ready.
Wicker paper Easter basket
The easiest way, of course, is to make your own Easter baskets from paper. And disposable cups or popcorn buckets will help give them the desired shape and stability.
Craft materials
So, before you make an Easter basket, you need to cut the cup at the desired height with your own hands. In fact, we are only interested in the bottom, which will be used as a basis for further work.
Cutting the cup
To get a larger basket, we fasten several cups together - three or four. We use polymer transparent glue for this purpose.
Gluing the cups
Now the most painstaking part of the work begins: you will need to cut sheets of colored paper into strips of the same width.
Strips 1 cm wide
Armed with a ruler, we draw out each sheet and cut it.
Cut the sheet into strips
Now comes the interesting part: let’s start weaving! We create a base for weaving by gluing the ends of several strips onto a piece of paper. Between them we will weave shorter pieces.
Let's start weaving
When the weaving is finished, fix the edges of each fragment with glue.
Finished weaving one strip
We should have two solid pieces of paper.
We weave two stripes
We glue them together to get a canvas of sufficient length.
Glue the strips together
This fabric needs to be wrapped around our design of disposable cups. In our case, it will take the shape of a heart, because we fastened three cups together.
Wrap the cups with stripes
Let's trace this heart on a piece of cardboard.
Circle the heart
And cut out the resulting silhouette. We will get the bottom of the basket, which will need to be glued to its rightful place.
Cut and glue as the bottom
Now let's take double-sided cardboard and cut out a fairly wide strip from it.
Strip 3 cm wide
We will use it to make a handle for the basket - we will simply attach the ends of the cardboard strip to the opposite walls of the basket. You can use a stapler or regular office glue for this purpose.
Fixing the handle of the basket
Let's decorate our craft with a bow and fill it with Easter souvenirs.
Decorate the basket with a bow
Painted eggs and eggs with surprise toys will come in handy.
Easter basket using paper weaving technique
Look at the video - how to make a simple paper basket:
Watch this video on YouTube
Easter baskets made of cardboard
You can make such a cute craft from thin A4 cardboard, scissors, a ruler, a pencil, double-sided tape or PVA, or colored paper.
Cut out an even square from cardboard.
We divide the sides into three equal parts and mark the points with a pencil.
We draw stripes with a non-writing pen, scissors or other sharp object, and bend the sheet along them.
Using scissors, cut the central square to the center line on opposite sides.
We lower the middle parts down, raise the outer ones, connect the two sides together, fixing the upper corners at an angle.
We make a handle from the same cardboard, about 2 cm wide, decorate it with a colored stripe (glue it with PVA or tape), fix it on a basket so that the joint can be later covered with a side square.
Close the sides.
We cut out a strip of green paper slightly wider than the height of the basket, make the edge in the shape of blades of grass, twist the ends with scissors, and fix it inside the craft.
We fill it with “straw” from thinly cut colored paper.
Decoupage with napkins
A very simple way to decorate Easter eggs, allowing you to get a variety of products. The main thing is to find beautiful paper napkins with a pattern, for example, with flowers.
You will need:
- eggs;
- cup;
- pin;
- beautiful napkins;
- scissors;
- PVA glue;
- brush.
Algorithm:
- Remove the contents of the egg as we described above. Use a pin.
- Cut out patterns from napkins. If they are large, two will be enough. You can even get by with just one.
- Spread the shell with glue and attach images cut out from napkins to it. Smooth thoroughly, but without pressing - remember: the shell is very fragile.
- Apply another layer of glue on top of the images and wait until it dries.
We knit beautiful baskets for eggs from knitted yarn with ears
For knitting lovers, we suggest knitting cute egg coasters to decorate the Easter table.
You will need a 6 and 9 mm hook and knitting yarn.
- We make a ring around the fingers from the thread and overlap the thread.
- Using a 9 mm hook, we dive under the first thread, grab the second and, holding the tails with our fingers, knit the air loop twice.
- We knit 12 double crochet stitches into the ring.
- We grab the loose tail of the thread and pull the knitting into a ring.
- We connect the row, the thread can be cut, we complete the weaving with a braid.
- We hide the edges of the thread under other threads, threading it as we weave.
- Take the thread again, form a loop on your finger, wrap the workpiece face down, start knitting, placing the hook in the center of the braid under the jumper, grab the thread, pull it out, make an air loop.
- We find the second braid, knit a single crochet, making several additions for a larger volume of the craft, and so we complete the entire row.
- To connect the columns at the end of the row, we pull out a loop, place a hook between the first and second row on the reverse side, put a loop on it, thread it, wrap the thread around the craft, now pull the working thread to tighten it.
- Now for the second row we make a yarn over, go under the first braid, pull out the working thread, knit it, make an air loop.
- We knit single crochets in a circle.
- At the end of the row, we yarn over again, hook the hook into the center of the joint, starting it from the bottom, grab the working thread, and knit a double crochet.
- We connect it by pulling the loop, stretching a loop between the first and second column.
- On the left side of the connection, we pass the hook into the center of the tick, draw the working thread between the loop and the hook, pull through the loop, tighten the thread.
- We knit the next row with double crochets along the ticks.
- We complete the row, tighten the thread.
- Take a 6 mm hook, grab the thread, knit 14 air loops.
- We knit a loop at the base of the column, forming an “eye.”
- This is exactly how we knit the second one.
- We cut the thread at a distance of 4-6 cm from the end of the weaving and tuck it inside the knitting.
Popular articles Accessories for a wedding photo shoot
How good it is to knit!
For those who love and know how to crochet, creating such an Easter craft will not take much time. And if your experience and imagination allow you to improvise, then a set may be the best idea for the holiday. It consists of a knitted Easter basket, eggs and chicks. Handicraft virtuosos create real masterpieces from yarn in the form of Easter bunnies, chickens and other cute animals. The set will be an excellent gift for godchildren, complete with Easter cake and sweets.
A crocheted Easter basket is a great solution for decorating your own interior.
Knitted souvenirs
A homemade Easter basket will be a wonderful holiday gift. If needlewomen are interested in crocheting, then the master class will help them create work of incredible beauty. Souvenirs for painted eggs look unusual and will be a wonderful present.
Materials:
- hook;
- scissors;
- yellow and mint colored yarn.
Execution sequence:
Let's prepare the yellow yarn and begin to create the bottom of the basket. To do this, we form a circle consisting of 36 loops. We knit 2 air loops, in the second we knit 6 single crochets. We knit 5 rows, making 6 additions in each.
In the second row we knit 2 double crochets in each loop. In the third row we knit 2 stitches through a loop. In the fourth row we make 2 stitches every 3rd loop, in the fifth - every 4th loop.
In the 6th row we form 3 lifting loops. Place the hook under the back wall and knit 1 double crochet. We again cast on 3 lifting loops, make a front relief double crochet. Then we knit a purl embossed double crochet stitch and make a knit stitch again.
Alternate the columns until the end. In the remaining rows we knit according to the pattern. Take a mint thread. Make a single crochet in each loop.
We knit 3 chain stitches, then a double crochet. We skip the base loop and knit a single crochet. We make 1 more pass, knit 4 double crochets.
- We knit this way until the end. We cast on 30 loops, making a sliding loop in each. We sew the second end of the handle.
- We decorate the composition at our discretion.
These baskets are quite easy to make.
They will be a wonderful souvenir for loved ones. Children will also find a use for them.
You can make your own Easter basket from anything. To understand the nuances of the work, you should familiarize yourself with the video master class. As a result, the creative process will become more understandable and will bring a lot of pleasure to the needlewoman.
Souvenir made from newspaper tubes
You can make your own Easter basket from newspaper tubes. A master class from experienced needlewomen will help bring any ideas to life. Such a souvenir will not go unnoticed; you can safely put food for the holiday table in it.
Materials:
- napkins;
- glue;
- scissors;
- spoke;
- dye;
- varnish;
- wire;
- newspapers;
- clothespins;
- round plate.
Execution sequence:
- We wind the newspaper onto the knitting needle. To complete the basket you will need approximately 90 pieces.
- We weave the bottom of the product. To do this, take 8 tubes and form them into a square. We bend the working part and place it behind 2 racks. We lower the top tube down and move the bottom tube up.
- We weave 2 rows in the same way.
- After which we move the racks in different directions and braid them one at a time.
- We continue to work until we get the bottom of the desired size. We bend the racks in a circle.
- We place a round shape inside the workpiece, lift the tubes up, and secure them with clothespins.
- We weave the basket until the required height is reached. Carefully remove the form and add another stand. The master class will tell you how to make an Easter basket with your own hands.
- We place the far part behind the second rack, and move the front part down.
- In this way we weave the entire row. As a result, we get 3 tubes.
- With their help, we weave 1 more circle, but we place the vine under the tubes of the top row.
- Let's start making the handle. For work, we will prepare 12 tubes, put 6 on one side, and bend them in half.
- As a result, we get 12 racks, which we divide into 3 bundles. We braid each part and secure the workpiece on top with clothespins. We make handles on 2 sides.
- We lift the braids up, twist them with wire, and apply glue. Let's prepare 1 more tube and braid the wire.
- We paint the product. To do this, mix paint and PVA glue in equal quantities. As soon as the craft dries, apply varnish.
- Let's start decorating the composition. Choose a bright napkin and cut out pictures.
- Carefully separate the layer with the image from the napkin and attach the pictures to the basket.
- Make a mixture of glue and water and wet the napkins. We coat the drawings with acrylic varnish.
The newspaper basket is ready. It looks original and unusual. At first glance, it seems that the product is purchased. This only means that the creative process was successful.
Important!
The decorated craft must be coated twice with acrylic varnish. In this case, each layer should dry well.
Decorating Easter eggs with ribbons
We bring to your attention two methods - simpler and more complex. Regardless of the complexity, the result is very beautiful.
In both cases, you will need blanks (preferably plastic), satin ribbons of two colors, glue (in a more complex version, you can use pins), scissors, a brush, and, if desired, rhinestones.
A simple option: an egg covered with ribbons
- Glue both tapes with their ends to the sharp part of the egg, overlapping each other.
- Stretch them to the blunt part and glue them crosswise.
- Step back a little and pull the ribbons up again, cross and attach.
- Do this over the entire surface of the egg.
Difficult option: “artichoke”
This technique is also called "bumping".
- Cut the ribbons into 2.5 cm pieces.
- Fold each piece into a corner.
- Cut a piece of tape the size of a centimeter square and attach it to one end of the egg. If you have a plastic base, use pins. If the egg is wooden, attach the pieces of ribbon with nails.
- Take 4 corners and attach them, long side down, flush to a square piece of tape.
- Apply this layer by layer until the very top. Each previous corner should peek out from behind the next.
- Cover the top with another square piece of tape.
If you want your craft to be able to hang, before closing the top, cut a narrow strip of ribbon, place the ends under the square (to form a loop) and glue.
Basics of weaving a basket for Easter
- First you need to prepare the “raw materials” - newspaper tubes. To do this, we cut sheets of newspapers into strips 10 cm wide and tightly wind each of the blanks in a spiral onto a wooden skewer. We fix the corner with glue so that the tube does not unwind during operation.
- The base will require 16 blanks. The photo shows how they need to be stacked together.
- We wrap one of the tubes, bent in half, around the base. In this case, we direct one of the ends above the main parts, the other end - below them. So we continue to weave 2-3 rows. If the working tubes run out, then we connect them with the next ones (we stick the ends into each other). After several rows of tubes, we separate the bases and continue to braid each one.
- When the bottom is ready, bend the base parts upward and continue weaving the walls. For convenience, you can put a deep bowl on the bottom and braid it. When the required height of the product is reached, the edges of the tubes should be carefully trimmed, bent inward and glued.
- You can form the handle as you work. You can simply leave a few tubes on the opposite side and continue braiding them to the required length. Or weave the handle separately and attach it to the basket.
- Now all that remains is to decorate and fill it with content.
Based on the proposed step-by-step description of making a paper basket, you can make other options for storing Easter eggs.
Origami egg cup
If you only have a sheet of paper at hand, then the origami technique will come to the rescue. It is loved by both children and adults and allows you to create wonderful things. Remember the airplane they used to fly during breaks at school? So, since those years we have become familiar with this technique.
In the picture below I give a step-by-step description of the work process.
It’s better to take a double-sided sheet, there are some for both the printer and for creativity. Look in office supply stores.
Another option for a felt basket for Easter eggs
On the eve of the holiday, pleasant chores await you: you need to paint eggs, buy sprinkles for Easter cakes, bake goodies, buy sweets to treat all your relatives. All this needs to be put somewhere, and therefore we offer another option for making a felt basket for Easter with your own hands.
Just imagine how much joy you will bring to your child by asking him to help in such an exciting activity. While making crafts, you can tell your child about the history of the holiday and how it is celebrated.
We need:
- Thick cardboard size A4.
- Felt of different colors, you can get by with a standard set: red, green, white, pink, emerald, yellow.
- Glue can be replaced with a glue gun.
- Sharp scissors.
- Simple pencil.
- Round stencil or compass.
- Beads for decoration.
- Painted eggs.
To prevent the contents from falling, the basket needs a strong cardboard base, which is what we will cover with felt, cut strictly to size. From colored fabric we cut out grass, the sun, and flowers, which we glue to the basket with glue guns in any order.
The grass can be glued to the bottom of the entire product, it will be a beautiful composition. Give children freedom of action and you will get a truly unique product.
You can make dies for a fence or sunflowers from yellow felt, it will be original. If you doubt your creative abilities, you can be guided by the attached photographs, there is an exact step-by-step explanation of each step.
Give the remaining beads to the kids, they will find a way to fit them into the basket. Add eggs and sweets to the finished product and you’re ready to go visit.